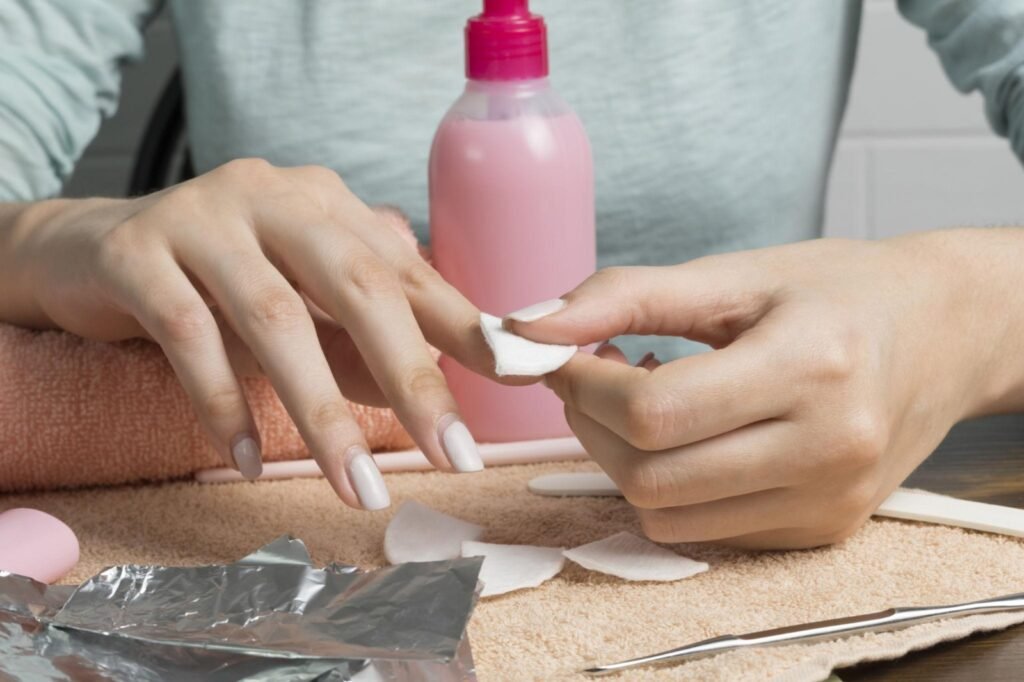
Gel nail polish is popular for its glossy finish, smooth appearance, and long-lasting wear. Unlike regular nail polish, gel formulas are cured under a UV or LED lamp, creating a durable coating that does not come off with ordinary nail polish remover. While this makes gel manicures convenient, removing them requires a little more care.
Many people make the mistake of peeling, scraping, or picking at gel polish when it starts lifting. Although this may seem like a quick solution, pulling away the coating can remove layers of the natural nail underneath. Over time, this can leave fingernails thin, rough, weak, and prone to peeling.
The good news is that you can remove certain types of gel nail polish at home using the right products and a careful technique. The key is to understand which gel formula you are wearing, allow the remover enough time to work, and avoid forcing the polish off your natural nails.
If you want to learn how to remove gel nail polish at home without damaging your nails, this guide explains the supplies you need, the removal process, common mistakes to avoid, and how to care for your nails afterward.
What You Should Know Before Removing Gel Nail Polish
Before starting the removal process, it is important to understand that not all gel nail products are designed to come off in the same way.
Regular soak-off gel polish is generally formulated to soften when exposed to acetone. This makes it suitable for careful at-home removal when you follow the correct procedure.
However, some other nail enhancement products require a different technique.
Soak-Off Gel Polish
Soak-off gel polish is commonly used for gel manicures. It is applied in thin layers and cured under a UV or LED lamp.
This type of gel can usually be removed using acetone and cotton wraps. The polish softens during the soaking process, allowing it to be gently removed without aggressively scraping the natural nail.
Hard Gel
Hard gel is a stronger nail enhancement product often used to create extensions or add structure to natural nails.
Unlike soak-off gel polish, traditional hard gel generally does not dissolve in acetone. It usually needs to be carefully filed down by a trained nail technician.
Trying to soak hard gel repeatedly or force it away from the nail can cause unnecessary damage.
Builder Gel and BIAB
Builder gel and BIAB, which stands for Builder in a Bottle, are used to add strength, structure, and sometimes additional length to natural nails.
Some builder gel formulas are soak-off products, while others are non-soak-off and require professional filing. The removal method depends on the specific formulation.
Always check the product instructions or ask the nail technician who applied it before attempting removal.
What You Need to Remove Gel Nail Polish at Home
Having the correct supplies ready makes the process easier and helps prevent unnecessary damage.
Here is what you should prepare before starting:
1. 100% Pure Acetone: Acetone is an effective solvent for removing many soak-off gel polish formulas. Regular nail polish remover may not be strong enough to break down the gel coating.
2. Cotton Balls or Cotton Pads: Small pieces of cotton help hold acetone against each nail during the soaking process.
3. Aluminum Foil or Plastic Food Wrap: These materials hold the acetone-soaked cotton in place. Plastic food wrap is recommended in the American Academy of Dermatology’s at-home removal method.
4. Nail File: A file may be needed to gently remove the shiny topcoat before soaking, depending on the gel product’s removal instructions.
5. Petroleum Jelly: A thin layer around the cuticles and surrounding skin can help reduce direct acetone exposure.
6. Warm Water and a Gentle Cleanser: These are useful for cleaning your hands after removal.
7. Hand Cream and Cuticle Oil: These products help moisturize the skin and cuticle area after the process.
It is also helpful to have a towel and a protected work surface because acetone can damage certain countertops, furniture, and other materials.
How to Remove Gel Nail Polish at Home: Step-by-Step
The following method is intended for soak-off gel polish, not traditional hard gel or other non-soak-off enhancements.
Take your time with each step. Removing gel polish should not involve force, painful scraping, or aggressive filing.
Step 1: Prepare Your Nails and Workspace
Start by washing your hands and making sure your nails are clean and dry.
Choose a well-ventilated area and keep acetone away from open flames, cigarettes, heat sources, and sparks. Acetone is highly flammable, so safe handling is important.
Protect your work surface with a suitable covering and gather all your supplies before opening the acetone.
If your nails are very long, you can carefully trim any excess free edge, provided you do not cut into the natural nail bed.
Step 2: Protect the Skin Around Your Nails
Acetone can dry out and irritate the skin, especially when it remains in contact with the cuticles and surrounding fingers for an extended period.
Apply a thin layer of petroleum jelly around the cuticles and the skin bordering each nail.
Avoid covering the actual nail plate because you want the acetone to make direct contact with the gel polish.
This small preparation step can help make the removal process more comfortable.
Step 3: Remove the Shiny Top Coat Carefully
Many soak-off gel systems have a glossy topcoat that needs to be lightly filed before acetone can penetrate the coating effectively.
Using a suitable nail file, gently remove the surface shine according to the product’s removal instructions.
The goal is to break the seal of the topcoat, not to file through the gel or reach the natural nail.
Avoid aggressive buffing, electric drills, or heavy pressure, particularly if you are inexperienced.
If you cannot confidently distinguish the gel layer from your natural nail, it is safer to have a nail technician perform this step.
Step 4: Apply Acetone-Soaked Cotton
Cut small pieces of cotton that are approximately the size of your nails.
Soak each piece in 100% pure acetone and place it directly over the gel-coated nail.
Using cotton that fits the nail helps limit unnecessary contact between acetone and the surrounding skin.
Avoid pouring acetone directly over your hands or soaking your entire fingers unnecessarily.
Step 5: Wrap Your Fingertips
Place plastic food wrap around each fingertip to hold the cotton securely against the nail.
The wrap should create a comfortable seal without squeezing your fingers too tightly.
You can work on one hand at a time to make the process easier.
The American Academy of Dermatology recommends plastic food wrap for its at-home removal method because it helps keep the acetone in contact with the nail and reduces dripping.
Step 6: Allow the Gel to Soften
Leave the wraps in place for approximately 10 minutes, following the product’s instructions.
Different gel formulas may require different soaking times, so do not assume every product will soften at the same speed.
When the time is complete, remove one wrap and check whether the gel has softened.
If the polish remains firmly attached, reapply the acetone-soaked cotton and allow additional time according to the manufacturer’s directions.
Do not rush this stage. Insufficient soaking is one of the reasons people end up scraping or peeling the product away.
Step 7: Gently Remove the Softened Polish
Once the gel has softened, use a washcloth dampened with warm water to gently rub away the loosened material, as recommended by the American Academy of Dermatology.
Work carefully and avoid rubbing the surrounding skin.
If the gel remains firmly attached, stop rather than forcing it off. Reapply the acetone wrap if the product is designed to soak off and allow more time.
Never use your fingernails, sharp metal tools, or excessive pressure to scrape away stubborn gel.
If the product does not soften after following its removal instructions, it may not be a soak-off formula. Professional removal is the better option.
Step 8: Clean and Moisturize Your Nails
After removing the gel polish, wash your hands with a gentle soap and lukewarm water to remove remaining acetone.
Pat your hands dry with a clean towel.
Apply a moisturizing hand cream and massage a small amount of petroleum jelly or cuticle oil around the nail folds.
Your natural nails may feel dry immediately after removal. This is not unusual, as acetone can remove moisture from the surrounding skin and contribute to temporary nail dryness.
Avoid immediately applying another gel manicure if your nails feel thin, sensitive, or damaged.
How to Remove Gel Polish Without Acetone
Many people prefer to avoid acetone because it can cause dryness and irritation. However, removing gel nail polish without an appropriate solvent is not always straightforward.
Regular nail polish removers, even acetone-free versions, generally cannot remove every type of gel formula effectively.
Some online remedies recommend using vinegar, lemon juice, toothpaste, baking soda, or rubbing alcohol. These ingredients are not reliable substitutes for a proper gel polish removal product.
Attempting to peel, lift, or scrape away gel because acetone is unavailable can damage the natural nail.
If you cannot or do not want to use acetone, the safest option is to ask a professional nail technician about an appropriate removal method for your specific gel product.
If you are sensitive to acetone or have experienced irritation from it, seek professional advice rather than experimenting with household mixtures.
Can You Remove Hard Gel and Builder Gel at Home?
This is an important distinction because hard gel and builder gel are not always removable using the same method as regular gel polish.
Traditional hard gel is generally non-soak-off. It must be carefully reduced through professional filing while preserving the natural nail underneath.
Builder gel and BIAB products vary. Some are designed to soak off with acetone, while others require filing.
If you are unsure which product was used, do not assume that leaving your fingers in acetone for longer will solve the problem.
Excessive filing can thin the natural nail, while attempting to lift firmly attached enhancement material can remove layers of the nail plate.
For thick enhancements, extensions, or non-soak-off products, professional removal is strongly recommended.
How to Care for Your Nails After Gel Removal
Removing gel polish is only part of maintaining healthy natural nails. Aftercare is equally important, especially if your nails have been exposed to repeated manicures or removal procedures.
Apply Cuticle Oil
Cuticle oil helps condition the skin surrounding your nails and reduces the uncomfortable feeling of dryness.
Apply a small amount to each nail and massage it gently into the cuticle area.
Jojoba oil, almond oil, and other moisturizing formulations are popular options for everyday cuticle care.
Use a Nourishing Hand Cream
Wash your hands gently and apply a moisturizing hand cream afterward.
Look for products containing ingredients such as glycerin, shea butter, ceramides, or petrolatum.
Pay particular attention to your fingertips and the skin around the nail folds.
Keep Your Nails at a Manageable Length
If your nails feel thin or fragile after removal, keeping them slightly shorter can reduce bending and accidental breakage.
Use a gentle file to smooth rough edges rather than cutting or aggressively buffing the nail surface.
Take a Break From Gel Manicures
If your natural nails are showing signs of damage, consider taking a break from gel polish and artificial enhancements.
The American Academy of Dermatology recommends allowing nails a break between gel manicures and moisturizing the nails and cuticles regularly.
During this period, focus on maintaining your natural nails rather than covering every imperfection with another product.
Avoid Picking at Peeling Nails
If you notice small layers peeling from the surface, do not pull them away.
Picking can remove additional layers and make the nails more vulnerable to further damage.
Keep the edges smooth, moisturize regularly, and allow the damaged portion to grow out naturally.
Common Gel Polish Removal Mistakes to Avoid
Even when you have the correct supplies, certain habits can make gel removal unnecessarily damaging.
Peeling Off Gel Polish
This is one of the most common mistakes.
When gel polish is pulled away, it can take layers of the natural nail plate with it. This may leave the nail rough, thin, and uneven.
Always use a suitable removal method instead of peeling the coating.
Using a Metal Tool to Scrape the Nail
A metal cuticle pusher or sharp instrument can damage the nail surface when used aggressively.
The American Academy of Dermatology advises against scraping softened gel away with an orange stick because this can also injure the natural nail.
If the polish does not come away easily, it needs more appropriate treatment or professional removal.
Soaking for Too Long Without Checking the Product
More acetone exposure does not automatically mean better removal.
Excessive exposure can dry and irritate the surrounding skin. Follow the manufacturer’s instructions and check the progress rather than soaking indefinitely.
Filing Too Deeply
Filing should never be used to remove the natural nail surface.
Aggressive filing can cause thinning, sensitivity, and white patches. If you are not confident about identifying the gel layer, avoid filing and seek professional help.
Using Household Ingredients as Gel Removers
Toothpaste, lemon juice, vinegar, and baking soda are not proven methods for safely dissolving gel polish.
Experimenting with these mixtures can waste time and may irritate your skin.
Choose a removal method designed for the particular product you are wearing.
When Should You Visit a Nail Technician?
Although some soak-off gel polish can be removed at home, not every manicure is suitable for DIY removal.
Consider visiting a professional nail technician if:
- You are wearing hard gel or thick builder gel.
- You are unsure which type of gel product was applied.
- The coating does not soften after following the correct instructions.
- Your nails are already very thin or damaged.
- You have extensions or multiple layers of nail enhancements.
- You are uncomfortable filing or removing the product yourself.
If you experience persistent redness, itching, swelling, pain, or nail separation, seek medical advice from a dermatologist. These symptoms may indicate irritation, an allergic reaction, or another nail problem.
Do not apply additional nail products over an irritated or potentially infected area.
Frequently Asked Questions
1. How Do You Remove Gel Nail Polish at Home Without Damaging Your Nails?
For soak-off gel polish, use an appropriate acetone removal method with cotton and fingertip wraps. Protect the surrounding skin, allow enough time for the gel to soften, and avoid scraping or peeling the coating. Hard gel and some builder products require professional filing instead.
2. How Long Does It Take to Remove Gel Nail Polish?
The time depends on the gel formula and its thickness. The American Academy of Dermatology’s plastic-wrap method uses approximately 10 minutes for soak-off gel polish. Some products require longer according to their manufacturer’s instructions.
3. Can Regular Nail Polish Remover Remove Gel Polish?
Most regular nail polish removers are not formulated to remove cured gel polish effectively. Soak-off gel generally requires an appropriate acetone-based removal method.
4. Can I Remove Gel Nail Polish Without Acetone?
There is no universally reliable household alternative for removing cured gel polish. Avoid peeling or scraping the coating. If you cannot use acetone, ask a professional nail technician to recommend a suitable method for your specific product.
5. Why Are My Nails Weak After Removing Gel Polish?
Nails may become thin, dry, or rough after repeated gel manicures and aggressive removal. Filing, scraping, and peeling can remove layers of the natural nail plate. Acetone can also contribute to dryness and irritation.
6. Should I Apply Cuticle Oil After Removing Gel Polish?
Yes. Cuticle oil is a useful part of post-removal care because it helps condition the skin surrounding your nails. You can also use a moisturizing hand cream to reduce dryness.
7. Can I Apply Regular Nail Polish Immediately After Removing Gel?
You can apply regular nail polish if your natural nails and surrounding skin are comfortable and healthy. However, if your nails feel thin, sensitive, or damaged, it is better to leave them bare temporarily and focus on moisturizing and protection.
8. Can I Remove Builder Gel With Acetone?
It depends on the specific builder gel formula. Some builder gels are soak-off products, while traditional hard builder gels require filing. Always check the product instructions before attempting removal.
9. Is It Safe to Remove Gel Nail Polish at Home?
At-home removal can be suitable for certain soak-off gel formulas when the correct method is followed. However, hard gel, thick enhancements, and damaged nails are better handled by an experienced nail technician.
Final Thoughts
Learning how to remove gel nail polish at home safely is just as important as choosing the right manicure. Although gel polish provides a beautiful, long-lasting finish, improper removal can leave your natural nails weak, dry, and prone to peeling.
Take time to identify the type of gel product you are wearing, prepare the correct supplies, and follow a suitable removal method. Never pull, peel, or aggressively scrape away stubborn polish.
After removal, give your natural nails some attention with regular moisturizing, cuticle care, and protection from harsh chemicals. If you are dealing with hard gel or a product that will not soften, professional removal is a much better choice than risking damage.
A beautiful manicure should not come at the expense of healthy natural nails. With careful removal and consistent aftercare, you can enjoy gel manicures while taking better care of your nails.
Leave a Reply