Smiley Face Nails: The Ultimate Guide to Happy Nail Art That’s Taking Over Social Media
Your nails are supposed to make you smile, but what if they literally had smiles painted on them? Smiley face nails have exploded across TikTok, Instagram, and Pinterest, transforming from a playful ’90s throwback into today’s most cheerful nail trend.
You’ve probably scrolled past countless videos of influencers rocking these adorable designs, wondering how they achieve such perfect little faces or whether you could recreate the look at home.
This comprehensive guide reveals everything you need to know about smiley face nails from simple DIY techniques to professional salon approaches that’ll have your fingertips spreading joy wherever you go.
What Are Smiley Face Nails and Why Are They So Popular?
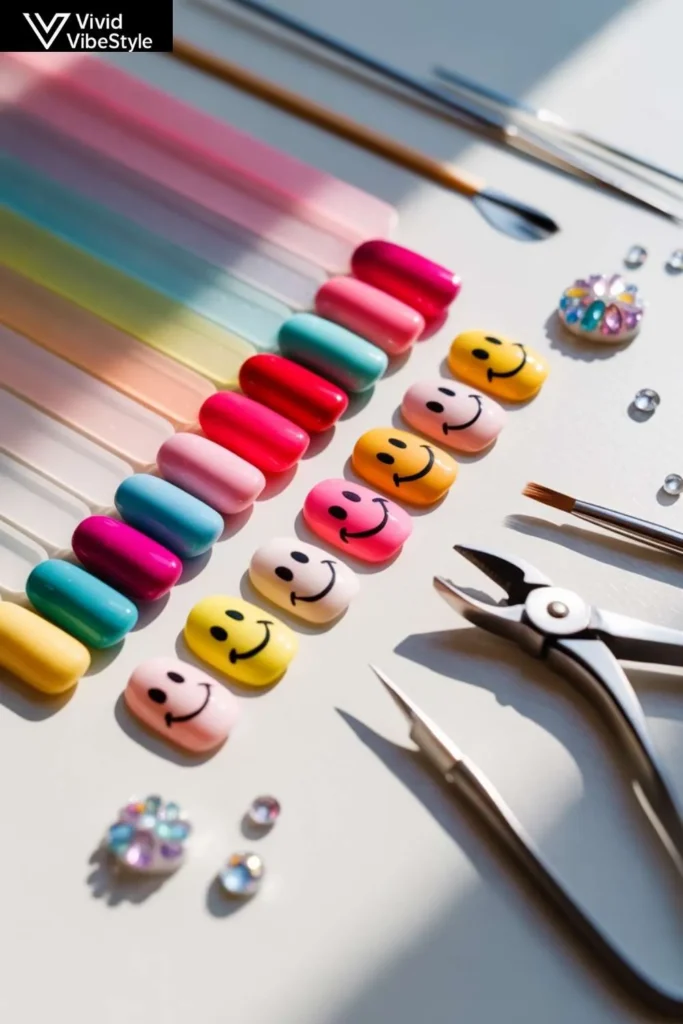
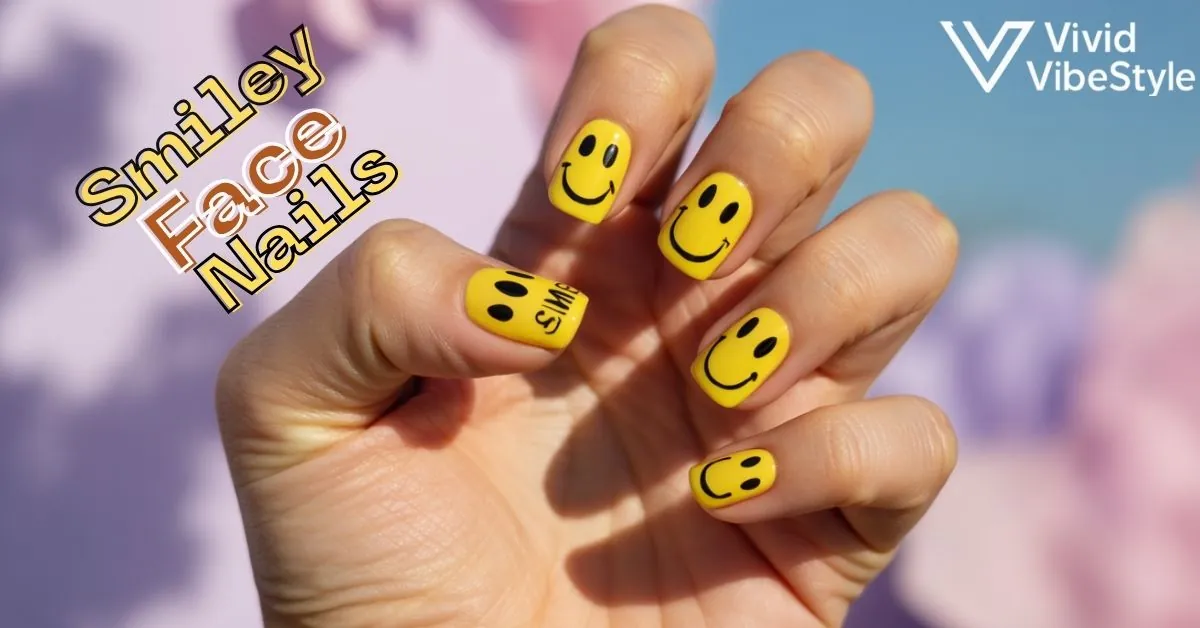
Smiley face nails are exactly what they sound like nail art featuring cheerful smiley face designs painted directly onto your nails or applied as decals. These happy face nail art creations typically showcase the classic yellow circle with two dots for eyes and a curved line for a smile, though modern variations include different colors, expressions, and artistic interpretations.
The trend’s popularity stems from its perfect blend of nostalgia and modern aesthetics, tapping into the ’90s revival while offering endless customization possibilities. Emoji nail designs like these resonate with social media culture, where visual communication and mood expression are paramount. They’re also incredibly versatile you can rock smiley face nails at the beach, in the office, or at a music festival, making them the ultimate mood-boosting accessory.
How to Create Perfect Smiley Face Nails at Home?
Creating DIY smiley nails is surprisingly simple once you master the basic technique. Start with a clean, well-prepped nail surface and apply your base coat, followed by your chosen background color classic yellow works beautifully, but pastel pinks, blues, or even clear bases can create stunning variations.
For the actual smiley faces, use a small detail brush or dotting tool dipped in black nail polish to create two small dots for eyes, positioned about one-third down from the top of your nail. Then, create the smile using a gentle curved stroke that connects the lower portions of an imaginary triangle between the eyes. Practice this motion on paper first to get the spacing and curve just right for your trendy nail designs.
Essential Tools for DIY Smiley Face Nail Art
Successfully creating smiley face nails at home requires specific tools that make the difference between amateur and professional-looking results. Invest in high-quality detail brushes (sizes 0 and 00), dotting tools in various sizes, and nail art pens for precise line work.
You’ll also need quality nail polishes in your chosen colors, a fast-drying top coat to seal your design, and nail art cleanup brushes for fixing mistakes. Many nail artists swear by using acrylic paints instead of nail polish for the facial features, as they provide better opacity and easier blending for more detailed cute nail art ideas.
See also : 3D Nails: Stunning Dimensional Nail Art That Turns Heads
What Are the Most Popular Smiley Face Nail Design Variations?
Yellow smiley face nails remain the classic choice, but today’s trend embraces countless creative variations. Pastel rainbow smileys create a dreamy, kawaii-inspired look that’s perfect for spring and summer, while black smileys on white backgrounds offer a chic, minimalist aesthetic that works in professional settings.
Some popular variations include winking faces, hearts for eyes, different mouth expressions like surprise or sleepy faces, and even adding small accessories like sunglasses or bows. Happy face nail art can also incorporate different textures matte backgrounds with glossy faces, glitter accents, or chrome finishes that make your smileys literally shine.
Trending Color Combinations for Smiley Face Nails
The color palette you choose dramatically impacts the overall vibe of your emoji nail designs. Soft pastels like lavender, mint green, and peachy pink create a gentle, feminine look that’s Instagram-ready, while bold neons in electric blue, hot pink, or lime green make a statement that’s perfect for festivals or parties.
Monochromatic schemes work beautifully too white smileys on black nails create a striking contrast, while tone-on-tone approaches like light yellow faces on darker yellow backgrounds offer subtle sophistication. The key is choosing colors that complement your skin tone and match your personal style preferences.
Which Nail Shapes Work Best for Smiley Face Designs?
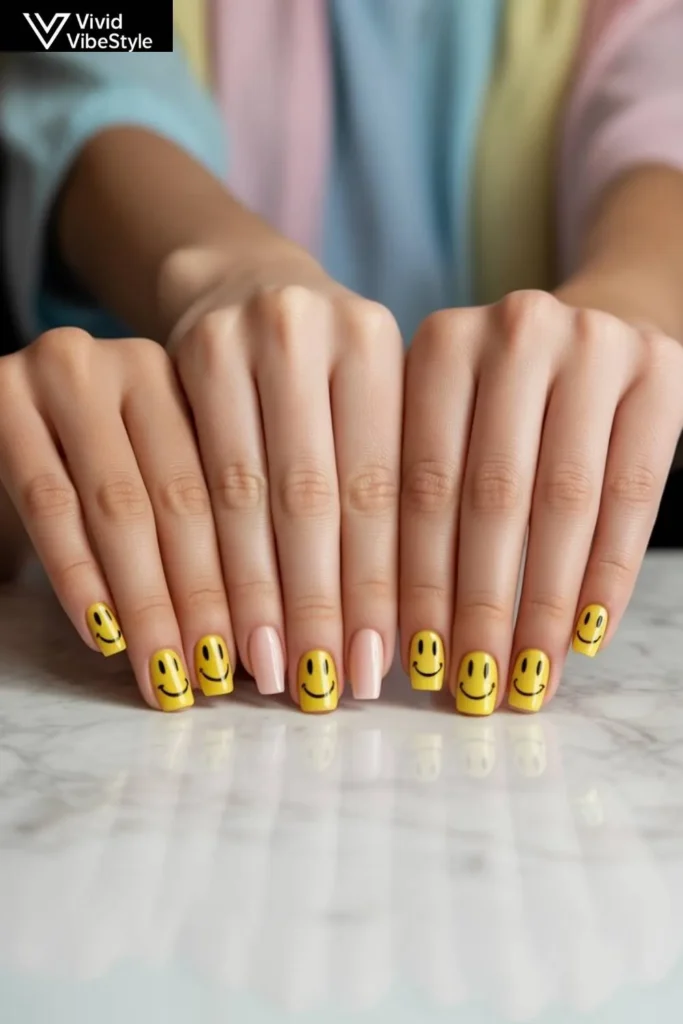
Smiley face nails work on virtually any nail shape, but certain cuts showcase the design more effectively. Square and squoval shapes provide the most surface area for detailed facial features, making them ideal for beginners or those who want their smileys to be the focal point.
Round and oval nails create a softer, more organic canvas that complements the friendly nature of happy face nail art. Coffin and stiletto shapes can work beautifully for trendy nail designs, but require more skill to proportion the faces correctly due to the tapered shape. Consider your lifestyle and skill level when choosing the optimal shape for your smiley nail art.
Nail Length Considerations for Optimal Smiley Designs
Short to medium-length nails typically work best for DIY smiley nails, as they provide adequate space for the design without overwhelming the nail bed. Very short nails can make the faces appear cramped, while extremely long nails might make the proportions look off unless you’re skilled at scaling designs appropriately.
If you prefer longer nails, consider placing the smiley faces closer to the cuticle area or creating smaller, multiple faces across the nail surface. This approach maintains proper proportions while allowing you to showcase your length preferences alongside your cute nail art ideas.
How Long Do Smiley Face Nails Typically Last?
The longevity of smiley face nails depends heavily on the application method and lifestyle factors. Hand-painted designs using quality nail polish and proper base/top coat application typically last 5-7 days before showing significant wear, while gel polish versions can maintain their appearance for 2-3 weeks.
Nail decals and press-on yellow smiley face nails offer different durability profiles high-quality decals can last up to 10 days with proper application, while press-ons might last 3-5 days depending on your activities and nail care routine. Professional salon applications generally offer the longest-lasting results, especially when using gel or dip powder techniques.
Tips for Extending Your Smiley Nail Art’s Lifespan
Proper preparation is crucial for long-lasting emoji nail designs. Start with clean, dehydrated nails, push back cuticles, and lightly buff the nail surface to create optimal adhesion. Apply thin, even coats of polish and allow each layer to dry completely before proceeding.
Protect your finished smiley face nails by wearing gloves during cleaning, avoiding excessive water exposure in the first 24 hours, and applying cuticle oil daily to maintain nail health. A quality top coat refresh every 3-4 days can also extend the life of your nail art significantly.
What’s the Best Way to Remove Smiley Face Nail Art?
Removing smiley face nails safely preserves your natural nail health while preparing for your next design. For regular nail polish designs, soak cotton pads in acetone-free nail polish remover, place them on each nail, and wrap with foil for 10-15 minutes before gently pushing the polish off with a cuticle pusher.
Gel polish trendy nail designs require a more intensive removal process file off the top coat, soak in acetone for 15-20 minutes, and carefully push off the softened gel. Never force or peel off nail art, as this can damage your natural nail plate and create long-term problems with nail health and growth.
Nail Care After Smiley Face Art Removal
Post-removal nail care is essential for maintaining healthy nails between happy face nail art applications. Immediately after removal, apply a nourishing cuticle oil and a strengthening base coat to replenish moisture and protect against brittleness.
Give your nails a 24-48 hour break between intense nail art applications, using this time to moisturize regularly and gently buff away any remaining polish residue. This recovery period helps prevent nail damage and ensures your next DIY smiley nails application adheres properly.
See also : Bold Leopard Nails: The Ultimate Guide to Fierce Nail Art in 2025
How Much Do Professional Smiley Face Nails Cost?
Professional smiley face nails pricing varies significantly based on location, salon reputation, and technique complexity. Basic hand-painted smiley designs typically cost $35-50 at standard nail salons, while high-end salons or nail art specialists might charge $60-80 for more detailed cute nail art ideas.
Gel polish applications with smiley designs usually fall in the $45-65 range, while specialty techniques like 3D elements, multiple colors, or intricate details can push prices to $80-120. Many salons offer package deals for full sets with nail art, which can provide better value than individual nail pricing.
DIY vs. Professional: Cost-Benefit Analysis
Creating yellow smiley face nails at home requires an initial investment in tools and supplies ($30-50 for basic kit), but subsequent applications cost only $5-10 in materials. Over time, DIY approaches offer significant savings, especially if you enjoy changing your nail art frequently.
Professional applications provide superior durability and artistic complexity but cost 3-5 times more per application. Consider your budget, skill level, and how often you want to change your emoji nail designs when deciding between DIY and professional options.
What Occasions Are Perfect for Smiley Face Nails?
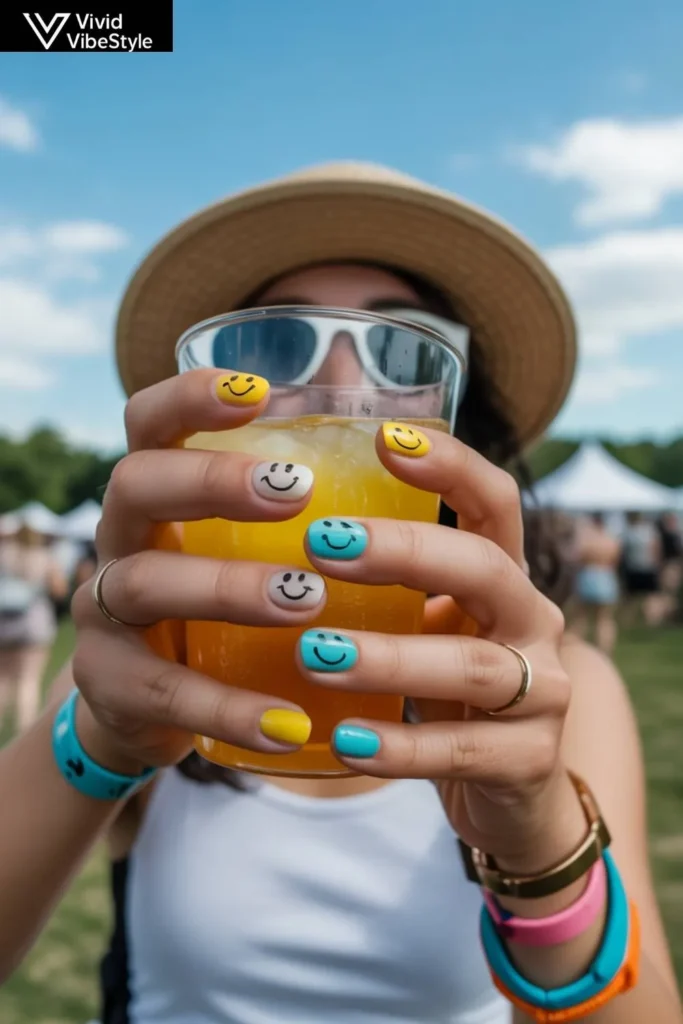
Smiley face nails work beautifully for casual everyday wear, bringing a touch of joy to mundane activities and sparking conversations wherever you go. They’re particularly perfect for summer events, beach vacations, music festivals, and any occasion where you want to express your fun-loving personality.
These happy face nail art designs also work surprisingly well in creative professional environments, adding personality without being overly distracting. Many teachers, artists, social media managers, and creative professionals use trendy nail designs like these to express their personal brand while maintaining workplace appropriateness.
Seasonal Considerations for Smiley Nail Art
Spring and summer naturally align with the cheerful energy of smiley face nails, making them perfect for warmer weather activities and brighter fashion choices. Pastel color schemes work beautifully for spring, while bold, bright combinations capture summer’s vibrant energy.
Fall and winter applications can incorporate seasonal colors like deep oranges, rich burgundies, or festive reds and greens. Holiday variations might include Santa hat smileys, snowman faces, or Valentine’s heart-eyed expressions, proving that cute nail art ideas can adapt to any season or celebration.
How to Photograph Your Smiley Face Nails for Social Media?
Capturing Instagram-worthy photos of your DIY smiley nails requires attention to lighting, angles, and background selection. Natural daylight provides the most accurate color representation, while a simple, uncluttered background keeps focus on your nail art without distracting elements.
Experiment with different hand positions fingers spread to show all nails, fists to create interesting compositions, or lifestyle shots incorporating your nails into everyday activities. Ring lights and smartphone macro lenses can help capture fine details in your emoji nail designs, making your posts stand out in crowded social media feeds.
Editing Tips for Nail Art Photography
Light editing can enhance your smiley face nails photos without making them look artificial. Adjust brightness and contrast to ensure accurate color representation, and use sharpening tools sparingly to enhance detail without creating harsh edges.
Many successful nail artists use consistent editing presets to create cohesive Instagram feeds that showcase their yellow smiley face nails and other designs. Apps like VSCO, Lightroom Mobile, or even Instagram’s built-in filters can help create a professional, polished look that attracts followers and engagement.
Common Mistakes to Avoid When Creating Smiley Face Nails
The most frequent error in smiley face nails creation is rushing the drying process between layers, leading to smudged designs and uneven textures. Allow each coat to dry completely this might take 2-3 minutes for regular polish and 30 seconds under LED for gel polish.
Another common mistake is making the facial features too large or poorly proportioned for the nail size. The eyes should be positioned in the upper third of the nail with adequate spacing between them, while the smile should be proportionally sized to create a balanced, happy expression rather than a grimace.
Proportion and Placement Guidelines
Proper proportions make the difference between cute happy face nail art and designs that look off-putting or unprofessional. As a general rule, eyes should be about 1/8 the width of your nail and positioned roughly 1/4 down from the cuticle edge.
The smile should span approximately 2/3 the width between the eyes and curve gently upward without extending below the nail’s center point. Practice these proportions on paper or practice wheels before attempting them on your actual nails to develop muscle memory for consistent results.
See also : Plus Size Wedding Dresses: The Ultimate Guide to Choosing Your Perfect Bridal Gown
Trending Smiley Face Nail Art Ideas for 2025
Current trendy nail designs featuring smiley faces incorporate mixed media elements like tiny rhinestones for eyes, holographic polishes for rainbow effects, and matte/glossy contrast combinations. Negative space designs where the smiley face is created by leaving natural nail visible while painting around it offer a modern, minimalist approach.
Ombré backgrounds with smiley faces, marble effects, and even tiny painted accessories like sunglasses, hats, or jewelry on the faces represent the cutting edge of cute nail art ideas. These advanced techniques require more skill but create show-stopping results that photograph beautifully for social media.
Incorporating Other Nail Art Trends
Smiley face nails pair beautifully with other popular nail art trends like French tips (smiley faces on French tip backgrounds), chrome finishes, and textured polishes. Combining multiple trends creates unique, personalized designs that stand out from basic smiley applications.
Consider incorporating seasonal elements flower crowns on spring smileys, sunglasses for summer, autumn leaves for fall, or Santa hats for winter. These combination approaches show creativity and keep your emoji nail designs fresh and engaging throughout the year.
Frequently Asked Questions About Smiley Face Nails
Can I create smiley face nails on short nails?
Yes! Smiley face nails work beautifully on short nails. Just scale down the facial features proportionally and consider placing the design closer to the center of the nail for optimal visual impact.
What’s the easiest way to make perfect circles for smiley face eyes?
Use dotting tools or the round end of bobby pins dipped in nail polish for perfectly round eyes. Practice on paper first to get consistent pressure and size for your DIY smiley nails.
How do I fix mistakes when painting smiley faces?
Keep a small brush dipped in nail polish remover handy for immediate cleanup. For dried mistakes, use a small brush with base color to paint over errors, then repaint the feature once dry.
Can smiley face nails work for professional settings?
Absolutely! Choose subtle colors like nude bases with small white or light gray smileys, or opt for monochromatic schemes that maintain professionalism while adding personality to your happy face nail art.
What nail polish brands work best for detailed smiley face designs?
Brands with good opacity and fine brushes work best for cute nail art ideas. OPI, Essie, and Sally Hansen offer excellent coverage, while nail art specific brands like Mundo de Uñas provide superior detail brushes.
How can I make my smiley face nails last longer?
Use quality base and top coats, allow each layer to dry completely, avoid excessive water exposure in the first 24 hours, and wear gloves during cleaning activities to protect your trendy nail designs.
Conclusion
Smiley face nails represent more than just a trendy nail art choice they’re a daily reminder to find joy in small details and share positivity with everyone you meet. Whether you’re creating simple DIY smiley nails at home or investing in professional happy face nail art, these cheerful designs offer endless possibilities for self-expression and creativity.
The best part about this trend is its accessibility anyone can master basic smiley face techniques with practice, patience, and the right tools.
From classic yellow smiley face nails to innovative color combinations and creative variations, this nail art trend continues evolving while maintaining its core message of happiness and optimism.
As you experiment with different techniques, colors, and styles, remember that the perfect smiley face nails are the ones that make you smile every time you look at your hands. Start with simple designs, build your skills gradually, and most importantly, have fun spreading a little more joy in the world, one manicure at a time.

