Simple Winter Nail Designs: Easy Ideas for Cozy, Chic Nails This Season
Winter brings shorter days and colder temperatures, but it also opens up a world of creative possibilities for your simple winter nail designs. Your nails shouldn’t hibernate just because the weather turns frosty. Many people struggle to find nail art that’s both seasonally appropriate and achievable at home without professional tools or advanced skills.
The frustration intensifies when you scroll through social media and see intricate designs that require steady hands, expensive equipment, and hours of patience. You want nails that capture winter’s magic think snowflakes, cozy sweaters, and festive sparkle without the complexity or cost of salon visits. The gap between inspiration and execution feels impossibly wide.
That’s where simple winter nail designs come in. These approachable styles deliver maximum impact with minimal effort, using basic tools you already own. Whether you’re preparing for holiday gatherings or just want to brighten up gray winter days, you’ll discover dozens of easy techniques that transform your nails into seasonal statements. From classic burgundy manicures to playful snowflake accents, these designs work for every skill level and nail length.
What Makes Winter Nail Designs Different from Other Seasonal Styles?
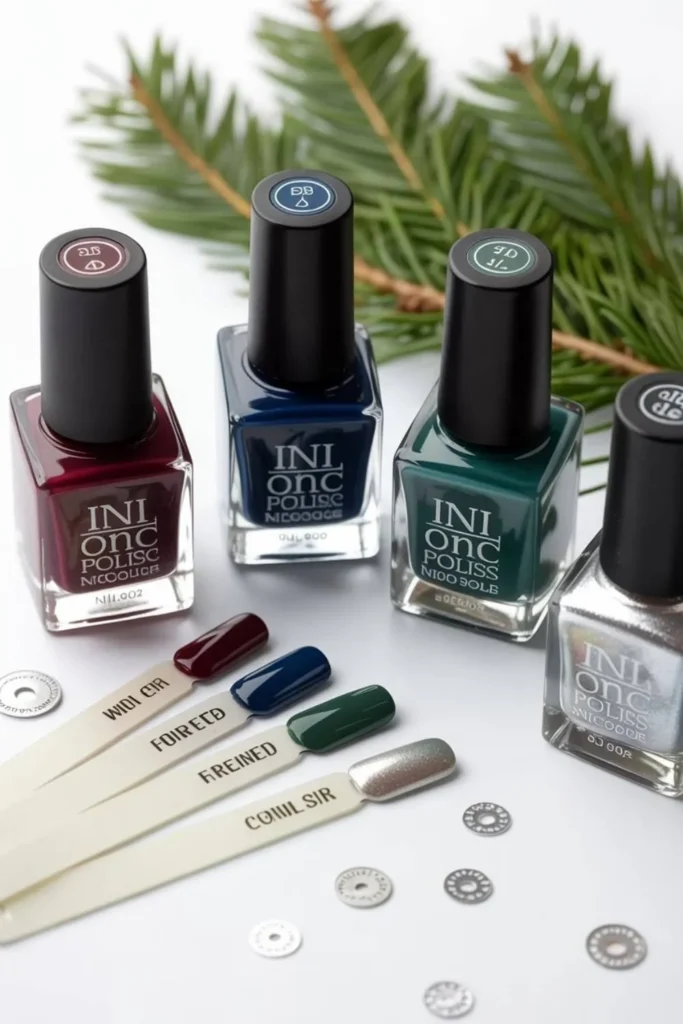
Simple winter nail designs embrace the season’s unique aesthetic through specific color palettes, textures, and motifs. Winter nails typically feature deeper, richer tones compared to spring pastels or summer brights. Think burgundy, navy, forest green, silver, and icy blue colors that mirror frosted windows, evergreen trees, and cozy fireplaces.
The textures also shift dramatically. Winter welcomes matte finishes, metallic accents, and glitter topcoats that capture how light reflects off snow. These tactile elements add dimension without requiring complex nail art techniques. A simple matte navy manicure instantly feels more sophisticated than the same color in glossy finish.
Winter nail art motifs draw inspiration from the season’s imagery. Snowflakes, sweater patterns, plaid designs, and minimalist Christmas trees appear frequently. These symbols work beautifully as accent nails, allowing you to keep most nails in solid colors while adding seasonal flair to one or two fingers. The contrast between simplicity and detail creates visual interest without overwhelming your hands.
Length and shape preferences also adapt to winter activities. Many people opt for shorter, rounded nails during winter months because they’re more practical for wearing gloves, typing with cold fingers, and handling winter clothing. Simple winter nail designs accommodate these practical considerations while maintaining style.
Why Choose Simple Over Complex Winter Nail Art?
Complex nail art might look stunning in photos, but simple winter nail designs offer practical advantages that elaborate patterns can’t match. First, they’re maintainable. When a chip appears on an intricate design, it’s glaringly obvious and often requires complete removal. Simple designs hide wear better and allow for quick touch-ups between full manicures.
Time investment matters significantly. Simple winter nail designs typically take 20-30 minutes to complete at home, while complex patterns might require two hours or more. During busy holiday seasons, that time difference becomes crucial. You can refresh your nails during a lunch break rather than dedicating an entire evening to nail art.
The learning curve is dramatically different. Simple designs require basic tools nail polish, dotting tools (or bobby pins), and striping tape. Complex patterns often demand stamping plates, detailed brushes, and steady hand control that takes months to develop. Simple winter nail designs let beginners achieve professional-looking results immediately.
Cost efficiency is another factor. Simple designs use fewer products and generate less waste. A classic burgundy manicure with gold accent nails requires just two polishes and perhaps some metallic tape. Complex patterns might need six different polish colors, multiple specialty tools, and advanced topcoats you’ll rarely use again.
See More : Mocha French Tip Nails 2025: The Sophisticated Twist on Classic Elegance
How to Choose the Perfect Winter Nail Color Palette
Your simple winter nail designs start with selecting the right color palette that complements your skin tone and personal style. Cool-toned skin looks exceptional with icy blues, silver, pure white, and deep purples. These winter colors enhance the natural undertones in your skin rather than competing with them.
Warm-toned skin glows alongside burgundy, copper, forest green, champagne gold, and chocolate brown. These rich, earthy tones create harmony with golden or peachy undertones. If you’re unsure about your undertone, look at your wrist veins blue or purple veins suggest cool undertones, while green veins indicate warm undertones.
Neutral undertones offer the most flexibility. You can pull off both cool and warm winter nail colors successfully. Consider building a capsule collection with classic burgundy, navy blue, soft gray, and rose gold. These versatile shades work across multiple outfits and occasions throughout the winter season.
The seasonal color theory matters too. Early winter (November-December) tends toward festive reds, emerald greens, and metallic golds for holiday celebrations. Mid-winter (January-February) shifts to moody blues, charcoal grays, and icy silvers that mirror the post-holiday landscape. Late winter begins incorporating lighter tones as spring approaches.
Consider your wardrobe when selecting winter nail designs. If you wear predominantly black and gray, bold burgundy nails or metallic silver accents add personality. If your winter wardrobe includes colorful sweaters and coats, neutral nude or soft pink base colors with subtle winter nail art prevent clashing.
What Are the Easiest Winter Nail Designs for Beginners?
Simple winter nail designs for beginners focus on techniques that require minimal skill while delivering impressive results. The single accent nail approach is the most forgiving starting point. Paint nine nails in one solid winter color like navy or burgundy, then add interest to one ring finger with glitter, metallic polish, or a contrasting color.
Ombre nails create a gradient effect that looks complex but uses a simple sponge technique. Apply your lighter winter shade as the base coat. Dab a makeup sponge into your darker color, then press it onto the nail tip, blending toward the cuticle. The organic blending hides imperfections beautifully, making it ideal for beginners learning simple winter nail designs.
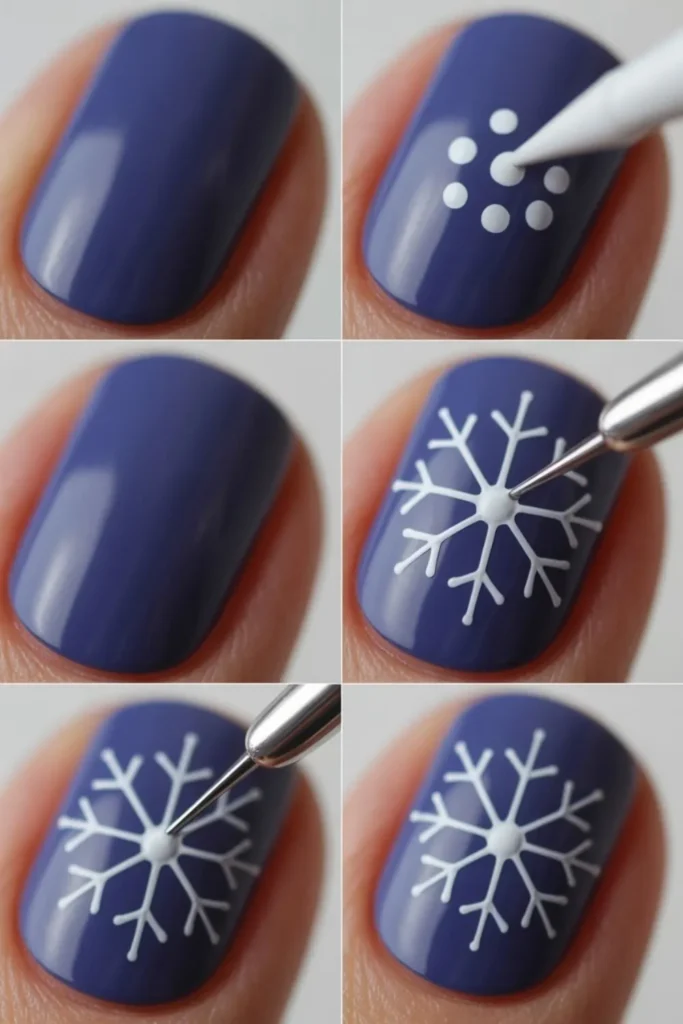
Dotting patterns require only a bobby pin or toothpick. Create snowflake designs by making five dots in a circle with a sixth dot in the center. Use white polish on a navy or gray base for classic winter snowflakes. The dots don’t need to be perfect slight irregularity adds charm and makes the design look intentionally handcrafted.
Striping tape offers professional-looking geometric designs without artistic skill. Apply your base color and let it dry completely. Place thin striping tape in straight lines or diagonal patterns, then paint over with a contrasting winter shade. Remove the tape while the polish is still wet to reveal clean lines. This technique creates plaid nail designs, color-blocking, and minimalist winter patterns.
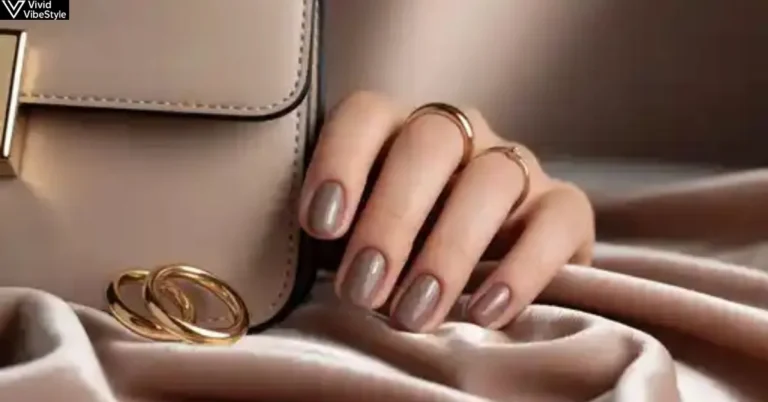
Matte topcoat transforms any basic manicure into a sophisticated winter nail design. Paint your nails with deep burgundy, forest green, or chocolate brown, then apply a matte finish. The texture change creates visual interest without requiring any artistic ability, and matte finishes are very forgiving of minor application imperfections.
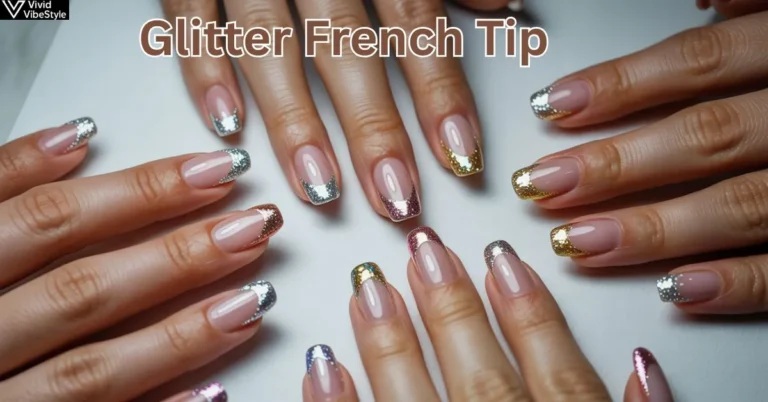
Glitter gradient offers sparkle without full coverage commitment. Apply your base winter color to all nails. On accent nails, dab glitter polish from the tip toward the middle of the nail, concentrating more glitter at the tips. This creates subtle sparkle that catches light beautifully and disguises tip wear as your manicure ages.
See More : Rust Almond Nails: The Ultimate 2025 Guide to Fall’s Most Sophisticated Trend
How Do You Create Perfect Snowflake Nails at Home?
Snowflake nail designs represent the quintessential simple winter nail art, and they’re more achievable than they appear. Start with a cool-toned base color like ice blue, soft gray, or deep navy. Let the base dry completely this prevents smudging when you add snowflake details. Rushing this step causes the most common failures in winter nail designs.
For the easiest snowflake technique, use a white nail art pen or striping brush. Create a simple asterisk shape with six lines radiating from a center point. Add small perpendicular lines at the end of each spoke to create the classic snowflake structure. The beauty of snowflakes is their natural variation no two need to look identical, which removes pressure for perfection.
The dotting tool method creates dimensional snowflakes. Make a small white dot in the center of your nail. Create six dots around it in a circle, then add smaller dots between each of those six. Use a toothpick to gently drag from the center dots outward, creating delicate branches. This technique produces organic, naturalistic snowflake nail art that looks hand-painted.
Stamping plates offer the fastest path to intricate snowflakes if you’re willing to invest in one tool. Apply polish to the stamping plate design, scrape away excess, then press the silicone stamper onto the image. Roll the stamper onto your nail to transfer the design. Stamping creates identical, detailed snowflakes across multiple nails in minutes, perfect for those who want simple winter nail designs without freehand painting.
Sticker and decal snowflakes provide the ultimate shortcut. Apply your base color and top coat. Once dry, place pre-made snowflake nail stickers on accent nails or scattered across all nails. Seal with another clear top coat. Quality decals look remarkably realistic, and this method takes just minutes to complete your winter nail design.
Which Winter Nail Designs Work Best for Short Nails?
Simple winter nail designs for short nails require strategic approaches that maximize limited nail space. Vertical elements create the illusion of length while embracing seasonal themes. Thin vertical stripes in white or metallic silver on a burgundy or navy base elongate the nail bed. Place stripes slightly off-center rather than in the exact middle for more sophisticated winter nail art.
Negative space designs work exceptionally well on short nails. Leave half the nail bare or use a nude base, then add winter motifs only to the tip or base. A simple white snowflake on a clear base at the nail tip keeps the design focused while making fingers appear longer. This technique is central to modern simple winter nail designs that prioritize elegance over coverage.
Single accent nails prevent short nails from looking cluttered. Paint all nails in a solid winter color like deep plum or forest green, then add decoration to only the ring finger. Try silver glitter, a small snowflake, or metallic gold accent. The restraint keeps the overall look clean while adding personality a hallmark of effective winter nail designs for shorter lengths.
Small-scale patterns adapt better to limited space than large designs. Instead of covering the entire nail with a sweater pattern, place a tiny knit texture only in the center. Miniature Christmas trees, simple stars, or tiny dots in white or gold create winter nail art that doesn’t overwhelm short nails. Scale is everything when working with less real estate.
Ombre effects running from cuticle to tip elongate short nails naturally. Start with a lighter winter shade at the base, transitioning to darker tones at the tip. The gradient draws the eye upward, creating length perception. Try blush pink to burgundy or ice blue to navy for classic winter nail designs that flatter short nails.
How Can You Make Winter Nail Designs Last Longer?
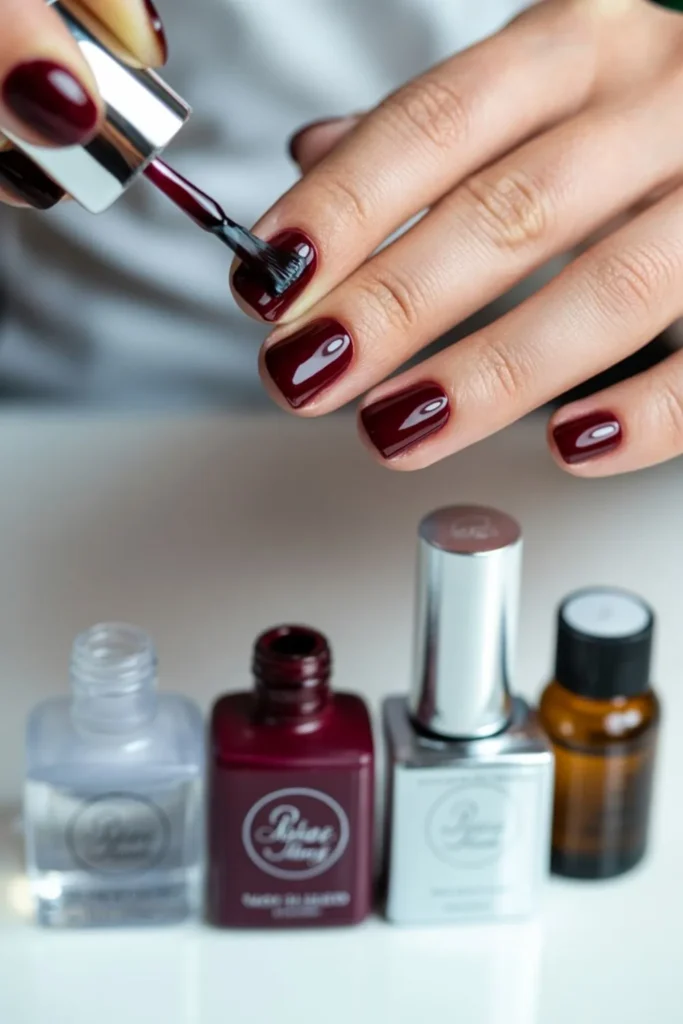
Extending the life of your simple winter nail designs starts with proper nail preparation. Clean nails thoroughly with rubbing alcohol or acetone to remove oils. This step ensures polish adheres properly rather than sliding around, which causes premature chipping. Push back cuticles gently and file nails to your desired shape before applying any winter nail polish.
The base coat is non-negotiable for long-lasting winter nail designs. Quality base coats create a smooth surface and prevent staining from darker winter colors like burgundy and navy. Ridge-filling base coats are particularly effective for older nails with texture issues. Apply thin layers thick base coats take longer to dry and may bubble.
Thin polish layers dry faster and chip less than thick applications. Two or three thin coats of winter nail polish outlast one thick coat significantly. Wait 2-3 minutes between each layer to allow proper drying. This patience pays dividends in durability. Cap the free edge by running the brush along the nail tip with each coat to seal the edge where chipping typically begins.
Top coat application makes or breaks longevity. Apply a quality quick-dry top coat to seal your simple winter nail designs. Reapply top coat every 2-3 days to refresh the protective layer and restore shine. This maintenance step takes minutes but can extend your manicure’s life by a week or more. Always cap the free edge with top coat just like you did with polish.
Hand care practices directly impact how long winter nail designs survive. Wear gloves when washing dishes, cleaning, or exposing hands to water for extended periods. Water weakens polish bonds and causes lifting. Apply cuticle oil daily to keep nails and surrounding skin flexible dry, brittle nails chip more easily than moisturized ones.
See More : Almond-Shaped Nails 2025: The Ultimate Guide to Filing, Styling & 30+ Trendy Designs
What Are the Most Popular Winter Nail Color Combinations?
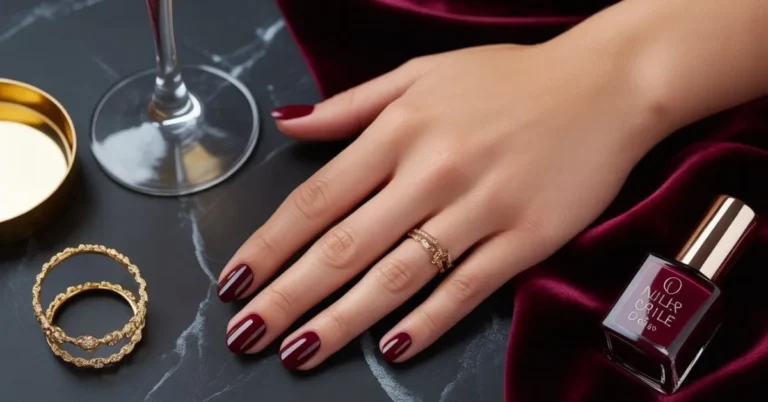
Simple winter nail designs shine when colors work together harmoniously. The burgundy and gold combination dominates winter nail trends for good reason. Deep burgundy or wine-colored base with metallic gold accents creates luxurious winter nail art suitable for holidays and everyday wear. Try four nails in burgundy with the ring finger in solid gold for classic elegance.
Navy and silver offers a cooler, more modern take on winter nail colors. Deep navy blue paired with silver glitter or chrome accents evokes winter nights and starlight. This combination works beautifully for professional settings while maintaining seasonal flair. The contrast between deep and light creates visual interest in your simple winter nail designs.
Forest green and copper brings earthy warmth to winter nail designs. Dark evergreen base with copper metallic accents or rose gold details feels organic and sophisticated. This combination works particularly well in early winter around holiday seasons. The warm metallic tones prevent green from feeling too stark or costume-like in your winter nail art.
White and silver creates the ultimate icy winter nail design. Pure white base with silver glitter, chrome finish, or snowflake accents captures winter’s frozen beauty. This combination photographs exceptionally well and works for any winter occasion. Add dimension by alternating matte white and glossy silver across different nails.
Plum and champagne offers subtle sophistication for simple winter nail designs. Deep plum or mauve base with champagne gold or rose gold highlights creates warmth without being too bold. This combination flatters most skin tones and transitions seamlessly from office to evening events. The muted tones feel expensive and intentional.
How Do You Create Cozy Sweater Nail Designs?
Sweater nail designs bring tactile winter comfort to your simple winter nail art. The technique creates a knit texture that mimics cable-knit sweaters. Start with a base color in classic winter tones cream, burgundy, gray, or forest green. Let the base dry completely before attempting the texture work, which is crucial for clean winter nail designs.
The powder technique creates the most authentic sweater texture. Apply a thick coat of polish in your chosen winter color. While still wet, dip a small brush into acrylic powder or embossing powder and pat it onto the nail surface in linear patterns. The powder adheres to wet polish and creates raised lines that mimic knit stitches. Seal with top coat once dry for durable sweater nail art.
For painted cable knit designs, use the same color polish as your base but work with a striping brush. Create vertical lines down the nail, then add small horizontal connecting lines to mimic knit patterns. The monochromatic approach makes the texture stand out through dimension rather than color contrast. This subtlety defines modern simple winter nail designs.
Matte finish amplifies the cozy sweater effect in your winter nail art. After creating your texture or pattern, apply a matte top coat instead of glossy finish. The flat surface captures light similarly to actual fabric, making the sweater illusion more convincing. This small detail elevates basic winter nail designs significantly.
Strategic accent nails work best for sweater patterns on shorter nails. Rather than attempting the texture on all ten nails, reserve the cable knit design for ring fingers or thumbs. Paint remaining nails in a complementary solid winter color. This approach provides visual interest without overwhelming your hands essential for balanced simple winter nail designs.
What Winter Nail Designs Work for Professional Settings?

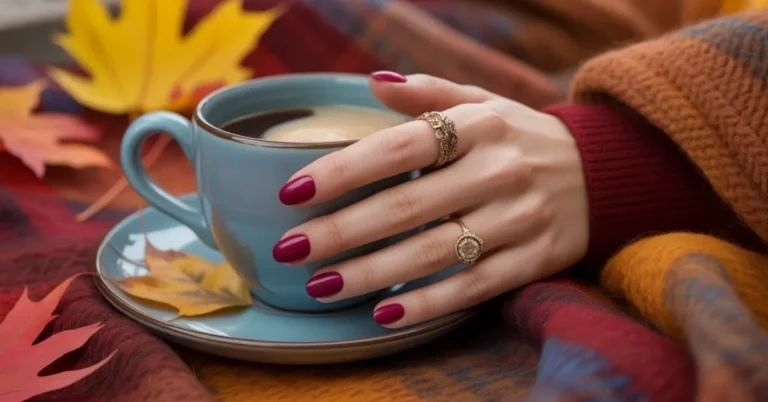
Professional environments require simple winter nail designs that balance seasonal style with workplace appropriateness. Deep jewel tones like burgundy, plum, navy, and forest green offer sophistication while respecting conservative dress codes. These winter colors appear polished and intentional rather than flashy or distracting during meetings and client interactions.
Length and shape matter significantly in professional contexts. Keep nails at a moderate length that doesn’t interfere with typing or handling documents. Round or squoval shapes appear more professional than dramatic stiletto or coffin shapes. Your winter nail designs should enhance your professional image rather than becoming a focal point of attention.
Minimalist accent nails allow personality without crossing professional boundaries. Paint all nails in a solid winter shade, then add subtle interest to one nail per hand. A thin gold stripe, small amount of glitter at the tip, or single snowflake maintains professionalism while incorporating simple winter nail art. The 9:1 ratio keeps designs understated.
French tips with winter colors modernize a classic professional style. Instead of traditional white tips, use burgundy, navy, or metallic silver. The familiar French structure reads as professional while the winter color palette adds seasonal relevance. This technique works exceptionally well for those in conservative industries who want subtle winter nail designs.
Matte finishes automatically elevate professional appearance. The sophisticated, non-reflective surface reads as more mature and intentional than high-gloss finishes. Apply matte top coat over any burgundy, plum, or gray winter nail color to instantly increase professional appropriateness while maintaining seasonal style.
See More : Leopard French Tips: 40+ Wild Ways to Rock Animal Print Elegance in 2025
How Can You Incorporate Glitter into Simple Winter Nail Designs?
Glitter transforms basic winter nail designs into festive statements without requiring artistic skill. The accent nail approach is the most professional way to incorporate sparkle. Paint four nails on each hand in a solid winter color like burgundy or navy, then coat one ring finger in silver or gold glitter polish. This restraint prevents the look from becoming too costume-like.
Glitter gradients create sophisticated sparkle in your simple winter nail designs. Apply your base winter color to all nails. On accent nails, use a makeup sponge to dab glitter polish from the tip toward the middle, concentrating coverage at the tips. The gradient effect offers sparkle while maintaining an overall polished appearance suitable for various occasions.
Glitter cuticles provide unexpected shimmer placement. Paint nails in a solid winter shade, then use a fine brush to apply glitter polish in a thin line along the cuticle area only. This reverse French technique looks modern and intentional. The small amount of glitter catches light beautifully without overwhelming your winter nail art.
Chunky glitter topcoat adds dimension to plain manicures. Apply two coats of your chosen winter color, then add a glitter topcoat with larger hexagonal pieces. The varied glitter sizes create depth and texture that photographs beautifully. This technique is perfect for holiday simple winter nail designs that need extra sparkle for evening events.
Targeted glitter placement offers control over sparkle levels. Use a glitter polish to create specific designs like snowflakes, diagonal stripes, or dots on a solid winter base. The glitter becomes the design element itself rather than overall coverage. This approach works well for those who want shine but find full glitter nails too bold.
What Are the Best Winter Nail Designs for Special Occasions?
Holiday parties call for bold simple winter nail designs that photograph well and match festive attire. Metallic chrome nails in gold, silver, or rose gold create maximum impact with zero artistic skill required. The mirror-like finish catches light from candles and holiday lights, making hands appear glamorous in photos. Pair with a single rhinestone on accent nails for extra drama.
New Year’s Eve demands sparkle in your winter nail art. Black base with silver glitter gradient creates sophisticated party-ready nails. The dramatic contrast works beautifully with cocktail attire while remaining elegant rather than tacky. Add silver striping tape in geometric patterns for modern edge that suits the celebration’s energy.
Winter weddings require simple winter nail designs that complement formal attire without competing with jewelry. Soft mauve, dusty rose, or champagne bases with subtle pearl accents maintain elegance appropriate for wedding photos. Keep designs minimal perhaps a single rhinestone at the base of ring finger nails to echo the symbolism of the event.
Holiday brunches with family suit festive but approachable winter nail colors. Cranberry red with gold accent nails or forest green with white snowflake details embrace the season without being too formal. These winter nail designs work well in natural daylight and pair easily with casual winter sweaters and comfortable pants.
Winter date nights benefit from romantic burgundy or deep plum winter nail designs. Add subtle rose gold shimmer or a single rhinestone heart on accent nails for playful romance. The sophisticated base colors suit intimate restaurant settings, while the small embellishments show you made special effort for the occasion.
How Do You Create Winter Nail Designs with Household Items?
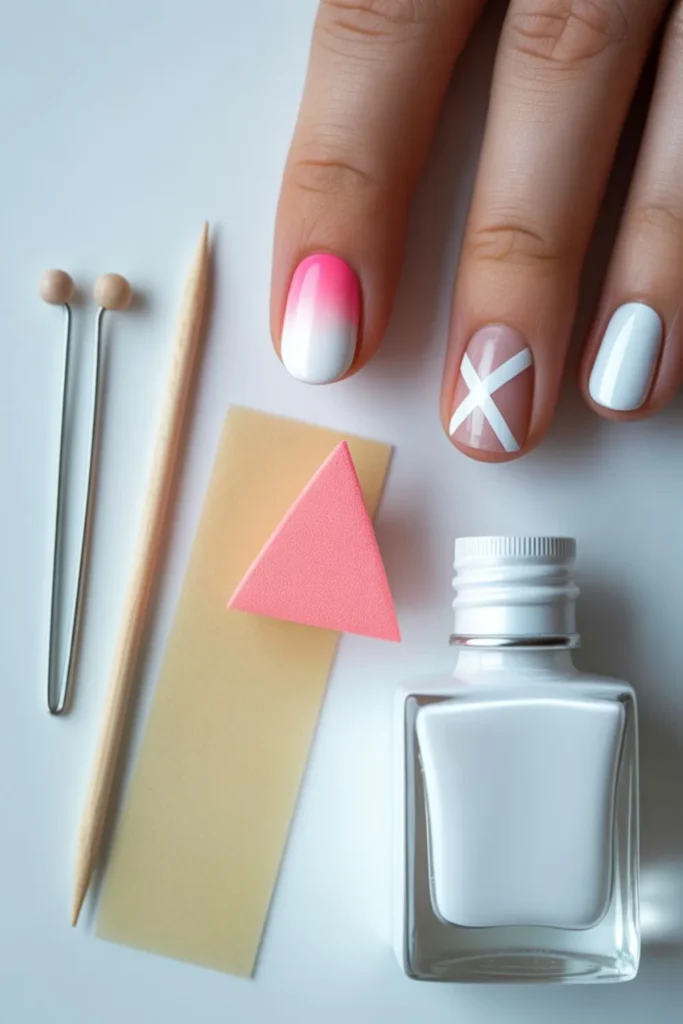
Simple winter nail designs don’t require expensive specialty tools. Bobby pins substitute perfectly for dotting tools when creating snowflakes or polka dots. Bend the bobby pin so one ball end sticks out further than the other, giving you two dot sizes. Dip in white polish and press onto your navy or gray base for instant winter nail art.
Scotch tape creates clean geometric lines in winter nail designs. Apply your base color and let it dry completely. Cut thin strips of tape and place them diagonally, vertically, or in grid patterns across nails. Paint over with a contrasting winter shade, then carefully remove tape while polish is still wet. You’ll reveal crisp, professional-looking color blocks.
Plastic wrap produces marbled effects perfect for simple winter nail designs. Apply your base winter color. Dab random spots of 2-3 coordinating colors onto the wet base. Press crumpled plastic wrap onto the nail surface and lift straight up. The irregular pattern creates organic texture that hides application imperfections while looking intentionally artistic.
Toothpicks work excellently for fine detail in winter nail art. Draw snowflakes, thin stripes, or delicate swirls using the pointed end dipped in contrasting polish. The precision rivals professional nail art brushes for simple winter nail designs that require fine lines. Keep paper towels nearby to wipe the toothpick clean between applications.
Makeup sponges create perfect ombre gradients in winter nail colors. Paint your lighter shade as the base. Dab the sponge into your darker winter tone, then bounce it gently from nail tip toward cuticle, reloading sponge as needed. The porous texture blends colors seamlessly, producing professional-looking gradients without special equipment.
See More : Autumn Nails: The Complete 2025 Guide to Fall’s Hottest Manicure Trends
Which Winter Nail Art Tools Are Worth Investing In?
Striping tape ranks as the most versatile tool for simple winter nail designs. These thin metallic strips in gold, silver, and rose gold create geometric patterns, frame accent nails, and add linear elements without artistic skill. One roll lasts through dozens of manicures, making it exceptionally cost-effective for varied winter nail art.
Dotting tools with multiple size tips expand your winter nail design options significantly. Five-piece sets cost under $10 and enable snowflakes, dots, flowers, and abstract patterns. The different tip sizes create dimension and variation within single designs. These tools make professional-looking simple winter nail art accessible to complete beginners.
Nail art brushes in various widths enable detailed painting for winter nail designs. Invest in a basic set with thin liner, flat shader, and fan brush. The liner creates snowflake details and thin stripes, the shader fills small areas, and the fan brush produces unique textured effects. Quality brushes maintain their shape through multiple cleanings with acetone.
Matte top coat transforms any manicure into sophisticated winter nail art instantly. One bottle serves dozens of applications and completely changes the visual impact of standard glossy polish. The flat finish elevates burgundy, plum, and forest green winter colors into contemporary statements. This single product significantly multiplies your simple winter nail design options.
Stamping plates with winter motifs deliver intricate designs without freehand painting skills. Look for plates featuring snowflakes, sweater patterns, holly, and geometric winter designs. Combined with a stamper and scraper, these tools allow you to create complex winter nail art in minutes. The initial investment pays off through repeated use across multiple winters.
FAQ‘S
What colors are trending for winter nails in 2025?
Deep burgundy, navy blue, forest green, and icy silver dominate 2025 winter nail trends. Moody plum and chocolate brown are gaining popularity for those seeking warmth without traditional red tones. Metallic finishes, particularly chrome and rose gold, continue trending for accent nails and special occasions, while matte finishes on any winter color remain sophisticated choices for everyday wear.
How long should winter nail designs last?
Properly applied simple winter nail designs should last 7-10 days without significant chipping. Gel polish extends this to 2-3 weeks, though growth becomes visible around day 14. Key factors include quality base and top coats, thin polish layers, and daily cuticle oil application. Reapplying top coat every 2-3 days and wearing gloves during water exposure maximizes longevity for your winter nail art.
Can I do winter nail designs on very short nails?
Absolutely! Simple winter nail designs work beautifully on short nails with proper design selection. Focus on vertical elements, single accent nails, and minimalist patterns rather than large-scale art. Ombre effects, thin striping tape, and small snowflakes create visual interest without overwhelming limited space. Short nails actually showcase certain winter colors like deep burgundy and navy more elegantly than longer lengths.
What’s the easiest winter nail design for beginners?
The single accent nail approach offers the easiest entry to simple winter nail designs. Paint all nails in one solid winter color, then add glitter polish to just the ring fingers. This requires no artistic skill but delivers noticeable style. Matte top coat over any solid color is equally simple while creating sophisticated winter nail art that looks intentional and contemporary.
How do I remove glitter polish from winter nails?
Glitter polish requires the foil method for efficient removal. Soak cotton balls in acetone, place them on each nail, then wrap fingertips in aluminum foil. Wait 10-15 minutes, then gently twist and pull off. The glitter should slide off with the cotton. This method removes stubborn glitter winter nail designs without excessive scrubbing that damages nail beds.
Are winter nail designs appropriate for work?
Professional simple winter nail designs focus on deep jewel tones, moderate lengths, and minimal embellishments. Burgundy, plum, and navy appear sophisticated in office settings. Limit glitter to single accent nails and avoid 3D decorations. Matte finishes increase professional appearance significantly. When uncertain, err toward more conservative winter nail colors and save bold winter nail art for weekends.
Conclusion
Simple winter nail designs offer endless creative possibilities without requiring professional skills or expensive salon visits. The techniques and color combinations covered here work for every nail length, skill level, and occasion throughout the season.
Whether you’re drawn to icy blues and silver snowflakes or prefer rich burgundy with gold accents, these approachable designs let you express seasonal style confidently. The key lies in starting with quality base coats, applying thin polish layers, and choosing designs that match your available time and skill level.
Winter transforms your nails into miniature canvases for expressing the season’s cozy elegance. From minimalist matte finishes to festive glitter gradients, these simple winter nail designs prove that sophistication doesn’t require complexity. Remember that household items like bobby pins, tape, and makeup sponges create professional results when used strategically.
Focus on color combinations that complement your skin tone and wardrobe, and don’t hesitate to start with single accent nails before attempting full designs. Your winter nail art should bring joy and confidence every time you look at your hands, making the effort worthwhile regardless of how simple or elaborate your chosen design becomes.


