Jelly Nails: The Translucent 2025 Trend That’s Taking Summer Beauty by Storm
Tired of scrolling through intricate nail art that demands salon trips, steady hands, and pricey products? Korean beauty icons are flaunting a fresh alternative, jelly nails. This translucent, juicy manicure delivers that coveted glazed-donut shine, yet it’s easy to DIY and budget-friendly enough for everyday wear.
This comprehensive guide reveals everything you need to know about creating and styling jelly nails, from understanding the Korean beauty origins to mastering professional application techniques.
You’ll discover why this trend is dominating 2025’s summer beauty scene, learn cost-effective methods for achieving salon-quality results at home, and explore creative variations that’ll transform your fingertips into eye-catching, Instagram-worthy statements.
What Are Jelly Nails and Why Are They Everywhere?
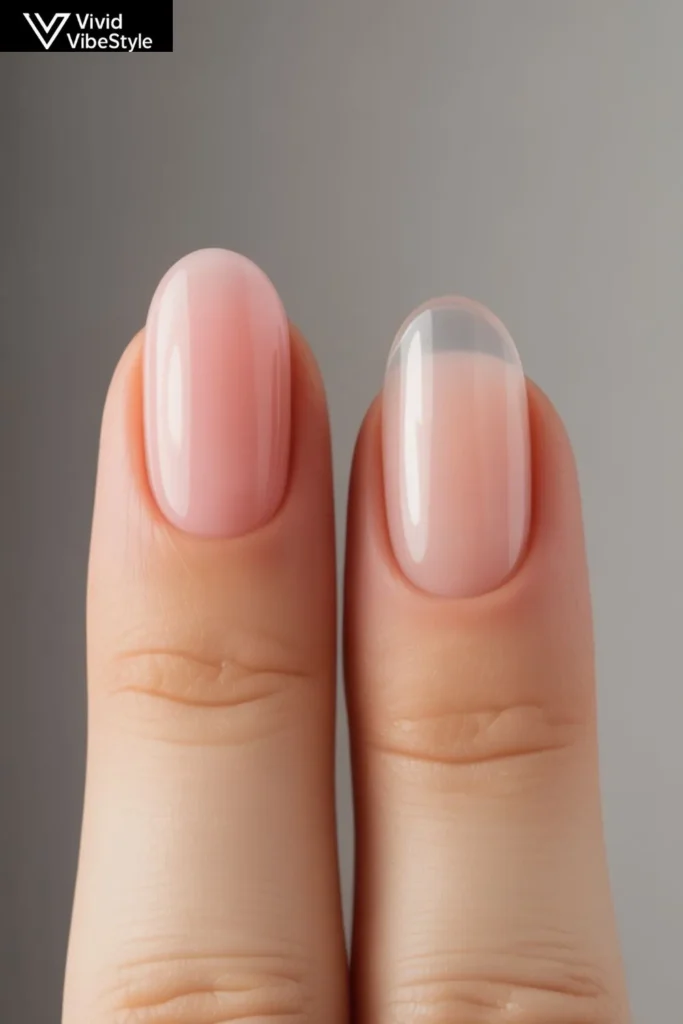
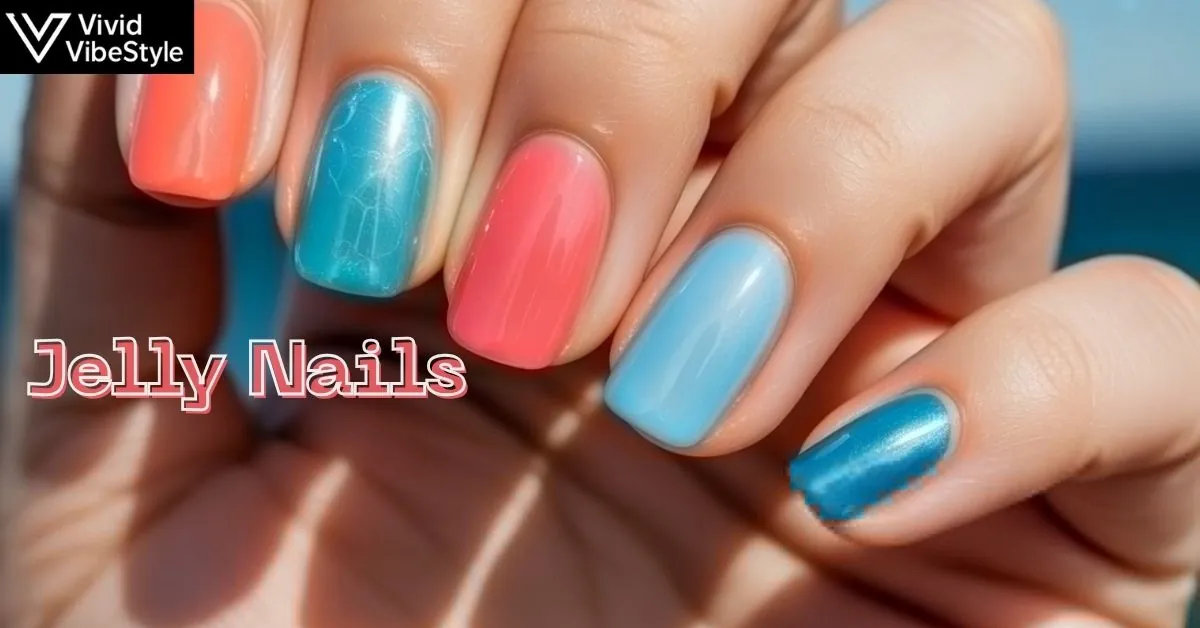
Jelly nails represent a nail art technique that creates a translucent, glass-like effect using semi-sheer polish formulations that allow your natural nail to show through. Like many of our favorite skincare habits and products, jelly nails originated in South Korea.
Jelly nails are all about semi-sheer pigment that allows for some of the natural nail to shine through. Coupled with an ultra-shiny top coat, it gives the same delectable, juicy effect as the beloved glazed donut skin trend that took beauty by storm.
The technique has exploded in popularity because it perfectly captures 2025’s aesthetic preferences for glass-skin effects and effortless beauty. Korean Jelly Nails, is yet further proof of this.
Defined by a jewel-like, light-reflecting aesthetic and soon to supersede their more complex nail art predecessors, jelly nails offer both visual impact and practical wearability that appeals to beauty enthusiasts seeking something unique yet manageable for daily life.
The Science Behind the Jelly Nail Effect
Jelly nails achieve their distinctive appearance through specific polish formulations that contain translucent pigments rather than opaque coverage. Their translucent coverage allows your natural nails to peek through for a liquid jelly effect, creating a look like no other.
Just as glossy as your classic polishes, these specialized formulations create depth and dimension that mimics the appearance of colored glass or translucent candy. The effect relies on light refraction through multiple translucent layers that build opacity gradually while maintaining that signature see-through quality.
The layering technique fundamental to jelly nails creates unique optical effects that change appearance under different lighting conditions. Multiple thin coats of translucent polish create depth and richness while preserving the natural nail’s visibility beneath.
This scientific approach to color layering explains why jelly nails photograph so beautifully and appear different in various lighting situations, creating that coveted multidimensional effect that’s impossible to achieve with traditional opaque polishes.
Understanding Jelly Polish Formulations
Jelly nails require specific polish formulations that differ significantly from traditional nail colors in their pigment concentration and base chemistry. These specialized polishes contain fewer opaque pigments and more translucent colorants that allow light to pass through while still providing visible color payoff.
The result is a unique formula that builds coverage gradually through layering rather than providing full opacity in single applications.
Professional jelly nail formulations often incorporate glass-like particles or light-reflecting ingredients that enhance the translucent effect and create additional dimension. Understanding these formulation differences helps explain why not all nail polishes can achieve the authentic jelly nail look and why investing in proper jelly-specific products produces superior results compared to diluting regular polish or mixing clear and colored formulations.
See Also : Orange Nails: The Vibrant 2025 Trend That’s Boosting Confidence and Creativity
How to Create Perfect Jelly Nails at Home
Creating salon-quality jelly nails at home requires specific techniques and products but remains accessible to nail art beginners with patience and practice. Start with completely clean, shaped nails and apply a ridge-filling base coat to create the smoothest possible foundation for your translucent layers.
The key to professional jelly nails lies in building opacity gradually through multiple thin applications rather than attempting full coverage in fewer thick coats.
Add a top coat to protect your jelly nails. If you’re using gel polish, use a gel top coat and cure your nails again. Finally, apply a clear protective top coat if you’re using regular non-gel nail polish.
If you’re doing gel nails, wipe each nail with a cotton ball soaked in 91% alcohol after curing them to remove lingering stickiness. This finishing process ensures maximum shine and longevity for your jelly nail manicure.
Essential Supplies for Jelly Nails
Successfully creating jelly nails requires specific tools and products designed to work with translucent formulations and achieve professional results. Your supply kit should include quality jelly nail polish in your chosen colors, a smooth base coat, precision brushes for cleanup, and a high-gloss top coat that enhances the glass-like effect. Professional cuticle care tools, nail files, and hand cream complete your jelly nail application toolkit.
The Goay set makes replicating the Jelly nail trend easy because it comes with premade polish that has the jelly nail look already, while other options include mixing your own formulations or purchasing specialized jelly polishes from brands that focus on this specific technique. Having quality cleanup brushes and acetone-free polish remover allows for precise application and easy corrections during the layering process.
Step-by-Step Application Technique
Begin your jelly nails application with proper nail preparation including cuticle care, shaping, and thorough dehydration of the nail surface. Apply a thin, even base coat and allow complete drying before proceeding with your first jelly polish layer. The foundation stage proves critical for jelly nails because any imperfections will show through the translucent layers.
Apply your first jelly nail coat in thin, even strokes, allowing complete drying between each application. Most jelly nail looks require 3-4 coats to achieve the desired opacity and depth, with each layer building upon the previous to create that signature translucent richness.
Professional techniques involve slightly overlapping each stroke and maintaining consistent pressure to avoid streaking or uneven coverage that becomes obvious through the translucent finish.
Popular Jelly Nail Color Combinations
Jelly nails work beautifully across a spectrum of colors, with certain combinations proving particularly popular for their visual impact and versatility. Think juicy peach shades, cherry red nails, and rich berry colors.
These red and orange summer shades will have you craving more, while blue and green jelly nails create ocean-inspired effects perfect for summer styling. The translucent nature of jelly formulations allows for unique color mixing opportunities impossible with opaque polishes.
Neutral jelly nails in nude, pink, and coral tones offer sophisticated alternatives that work beautifully in professional settings while maintaining the trend’s signature glass-like appeal.
These understated variations provide the psychological benefits of participating in current beauty trends while respecting conservative dress codes and workplace expectations.
Seasonal Jelly Nail Variations
Jelly nails adapt beautifully to seasonal color palettes while maintaining their translucent appeal throughout the year. Spring jelly nails often feature soft pastels like lavender, mint green, and baby pink that complement the season’s fresh, renewal-focused aesthetic.
Summer variations embrace vibrant corals, ocean blues, and sunset oranges that capture vacation vibes and warm-weather energy.
Fall and winter jelly nails can incorporate deeper, richer variations like burgundy, forest green, and navy that coordinate with seasonal fashion while maintaining the technique’s signature translucent quality.
These seasonal adaptations ensure your jelly nails remain current and appropriate while allowing you to experiment with different moods and color stories throughout the year.
Advanced Jelly Nail Art Techniques
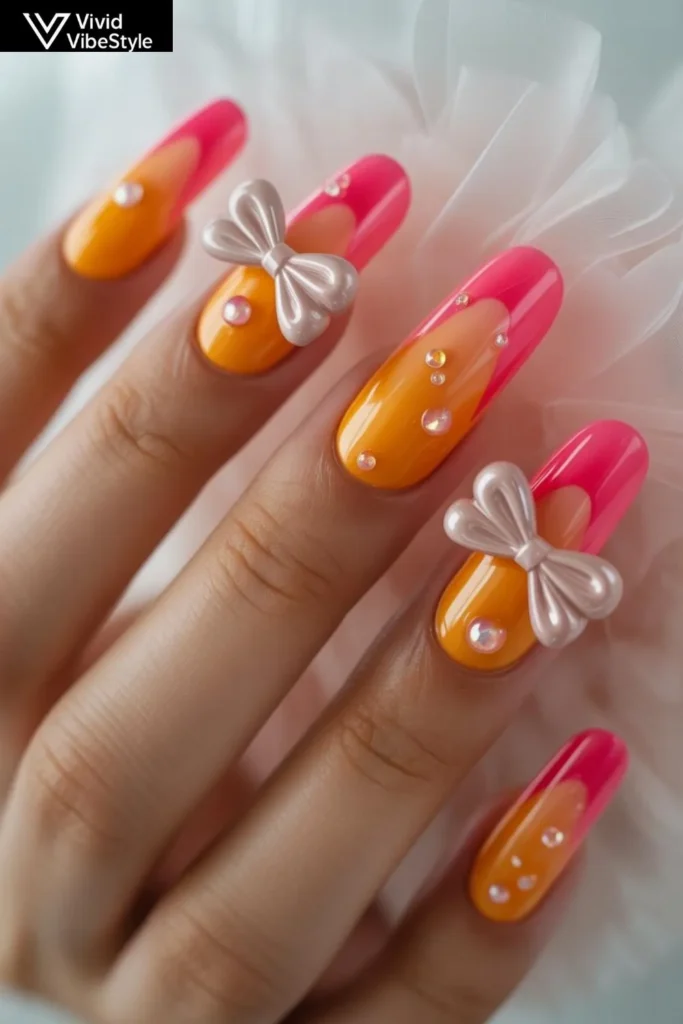
Jelly nails provide the perfect foundation for creative nail art that takes advantage of their translucent properties. Jelly Gel Polishes are perfect for this look as their sheer formulas create a soft, dreamy wash of colour that blends seamlessly.
Here, we’ve opted for a fun, tropical colourway of Orange and Hot Pink Jelly, demonstrating how multiple jelly colors can be layered and blended for artistic effects impossible with opaque formulations.
Canishiea J. Sams incorporates abstract squiggles and droplets on this set for an eye-catching textured masterpiece, but the world is your oyster, as there are about a bajillion variations you could try (like 3D bows, blobs, polka dots, hearts, and more).
Usually, this is done with builder gel and a teeny-tiny nail brush, then cured under a UV nail lamp, showcasing the versatility of jelly nails as a foundation for dimensional nail art.
Layering and Gradient Effects
Jelly nails excel at creating gradient and ombre effects that appear seamless and natural due to their translucent properties. Layering different jelly nail colors creates unique custom shades and depth effects that change appearance under different lighting conditions.
This technique allows for personalized color creation and ensures your jelly nails remain unique to your aesthetic preferences.
Professional gradient jelly nails often involve sponging techniques that blend colors while wet, creating soft transitions impossible to achieve with opaque formulations. The translucent nature of jelly polishes means mistakes blend naturally rather than creating harsh lines, making gradient effects more forgiving for beginners while still producing sophisticated results.
Jelly Nails Cost Analysis: DIY vs. Salon
Creating jelly nails at home offers significant cost advantages compared to salon services while providing creative control over color choices and design complexity. Initial supply investment typically ranges from $35-60 for quality jelly nail polishes, base coat, top coat, and application tools, but these materials create multiple manicures over time. The per-application cost drops to approximately $4-8 once you have all necessary supplies.
Professional salon jelly nails typically cost $45-85 depending on location, complexity, and additional design elements included. While salon applications often provide superior longevity and technical execution, the cost difference makes DIY jelly nails attractive for budget-conscious beauty enthusiasts who enjoy the creative process and don’t mind investing time in learning proper layering techniques.
Building Your Jelly Nail Kit
Creating a comprehensive jelly nail kit requires strategic purchasing that balances quality with budget considerations. Start with three essential colors: a nude/pink jelly nail polish for everyday wear, a vibrant summer shade like coral or blue, and a deeper tone for fall/winter styling. This foundation provides versatility while keeping initial investment manageable.
Expand your jelly nail collection gradually by adding complementary shades and specialized tools as your skills develop. Quality matters significantly with jelly nail formulations invest in reputable brands that offer true translucent effects rather than attempting to create jelly effects with diluted regular polishes that often produce disappointing results with poor longevity.
See Also : Cloud Nails: The Dreamy Manicure Trend Taking 2025 by Storm
Maintaining and Extending Jelly Nail Longevity
Jelly nails require specific maintenance approaches that account for their layered construction and translucent properties. The multiple layers that create the signature jelly nail effect can actually provide additional durability compared to single-coat applications, as minor chips often blend naturally into the overall translucent appearance. However, proper application and aftercare remain essential for maximizing wear time.
Daily care for jelly nails should include gentle hand washing with mild soap, immediate drying to prevent water damage, and regular cuticle oil application to maintain nail and skin health. The glossy finish characteristic of jelly nails benefits from mid-week top coat touch-ups that refresh shine and extend overall wear time significantly.
Troubleshooting Common Jelly Nail Issues
Jelly nails beginners often encounter specific challenges that can be resolved with proper technique adjustments and product knowledge. Streaky or uneven jelly nails typically result from applying coats too thickly or not allowing adequate drying time between layers. The solution involves using thinner applications and patient layering that builds opacity gradually.
Color mudiness in jelly nails often occurs when incompatible colors are layered or when base preparation is inadequate. Prevent this by choosing complementary color combinations and ensuring completely clean, oil-free nail beds before application.
If problems persist, consider starting over rather than attempting corrections that often worsen the overall appearance.
Styling Jelly Nails for Different Occasions
Jelly nails offer remarkable versatility for various social and professional settings when styled appropriately. For office environments, choose subtle jelly nail colors like nude pink, soft coral, or clear with minimal color tint that add visual interest without appearing unprofessional. The translucent quality of jelly nails actually makes bold colors appear more subdued and workplace-appropriate than their opaque counterparts.
Evening and special occasion jelly nails can embrace more dramatic variations like deep berry tones, vibrant blues, or artistic layering effects that complement formal attire and celebratory atmospheres. The glass-like quality of jelly nails photographs beautifully under artificial lighting, making them perfect for special events and social media moments.
Coordinating Jelly Nails with Fashion
Jelly nails pair beautifully with various fashion styles due to their translucent, light-reflecting properties that complement rather than compete with clothing choices. The glass-like quality of jelly nails works particularly well with minimalist aesthetics, clean lines, and modern silhouettes while adding softness to structured or geometric fashion elements.
Seasonal fashion coordination with jelly nails creates cohesive styling opportunities throughout the year. Summer’s light fabrics and bright colors pair perfectly with vibrant jelly nail shades, while autumn’s rich textures complement deeper jelly tones. Winter styling benefits from jelly nails that add luminosity and freshness to darker seasonal palettes.
Health Considerations for Jelly Nails
Creating beautiful jelly nails requires attention to nail health and safety practices that support both aesthetic goals and long-term nail wellness. The layering technique used in jelly nails involves more product application than single-color manicures, making proper base coat protection essential for preventing staining or damage. Choose “3-free” or “5-free” formulations when possible to minimize exposure to potentially harmful chemicals.
The multiple layers in jelly nails can sometimes lead to longer removal times, making gentle removal techniques particularly important for nail health. Use acetone-based removers efficiently but limit exposure time, and always follow removal with intensive moisturizing treatments to replenish lost moisture and maintain nail flexibility.
Safe Jelly Nail Removal
Proper jelly nail removal protects your natural nails and prepares them for future applications without causing damage. The layered nature of jelly nails means removal may take slightly longer than single-coat manicures, but patience prevents damage from excessive scrubbing or aggressive techniques. Soak cotton balls with acetone-based remover, place them on each nail, and wrap with aluminum foil for 15-20 minutes.
After removal, immediately apply cuticle oil and rich hand cream to counteract moisture loss from the removal process. Consider giving your nails a brief break between jelly nail applications if you notice any signs of thinning, weakness, or persistent staining that might indicate damage from frequent layering or improper removal techniques.
Jelly Nails in Social Media and Pop Culture
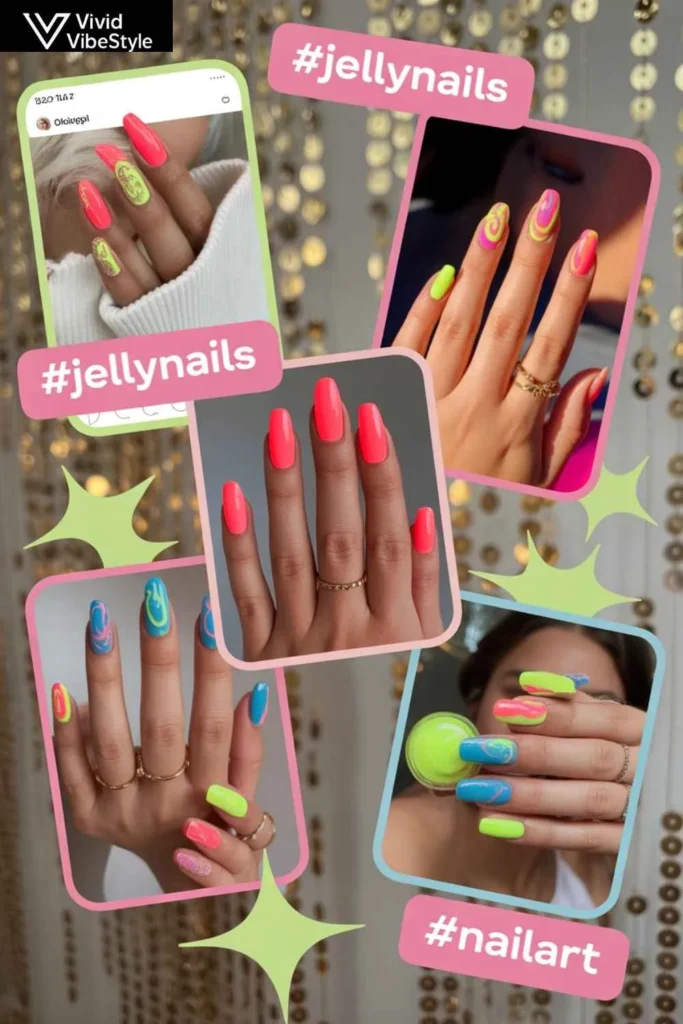
Jelly nails have gained significant traction across social media platforms, particularly TikTok and Instagram, where their photogenic qualities and accessible application techniques make them perfect for beauty content creation.
According to celebrity manicurists, jelly nails are here to stay, reflecting their transition from trend to established beauty technique with lasting appeal.
The hashtag #jellynails has generated millions of views across platforms, with beauty enthusiasts sharing application techniques, color combinations, and styling ideas that continue to evolve the trend. This digital community aspect has accelerated jelly nail adoption and helped establish the technique as a legitimate alternative to traditional nail art approaches.
Celebrity Jelly Nail Inspiration
Jelly nails have appeared on numerous red carpets and celebrity social media accounts, elevating the trend from DIY beauty hack to high-fashion statement. These high-profile endorsements have helped legitimize jelly nails as sophisticated beauty choices suitable for any occasion or style preference.
Celebrity variations of jelly nails often incorporate luxury elements like custom color mixing, professional application techniques, and artistic enhancements that inspire everyday users while remaining achievable through DIY methods. This accessibility factor has contributed significantly to the trend’s widespread adoption and continued evolution.
Future Trends and Innovations in Jelly Nails
Jelly nails continue evolving as nail artists and beauty brands experiment with new formulations, application techniques, and artistic possibilities. Emerging innovations include magnetic jelly polishes that create unique patterns, color-changing jelly formulations that respond to temperature, and textured jelly polishes that add dimensional effects while maintaining translucent properties.
Technology integration represents another frontier for jelly nail evolution, with UV-reactive formulations that enhance color intensity in sunlight and holographic particles that create rainbow effects within translucent bases. These innovations expand creative possibilities while maintaining the core translucent aesthetic that defines the jelly nail trend.
Sustainability in Jelly Nail Products
Environmental consciousness increasingly influences jelly nail product development as consumers seek eco-friendly alternatives that don’t compromise performance or aesthetic results. Water-based jelly nail formulations, biodegradable glitters, and refillable packaging represent growing market segments that support sustainable beauty practices.
DIY jelly nails naturally support sustainability goals by reducing salon visits, transportation emissions, and packaging waste associated with frequent professional services. Choosing long-lasting, high-quality jelly nail products over disposable alternatives further enhances environmental benefits while supporting responsible consumption practices that align with modern values.
See Also : Swirl Nail Ideas: 2025’s Ultimate Guide to Mesmerizing Swirl Nail Art
Professional Tips for Jelly Nail Success
Achieving consistently beautiful jelly nails requires understanding professional techniques and common pitfalls that can affect results. Temperature and humidity significantly impact jelly nail application, with cooler conditions often producing better layering results and preventing premature thickening of translucent formulations. Working in thin layers remains the most critical factor for professional-quality results.
Professional nail artists recommend practicing jelly nail techniques on nail wheels or practice hands before attempting full manicures, as the translucent nature makes mistakes more visible and correction more challenging than with opaque polishes. Patience and proper timing between coats prove essential for achieving that signature glass-like finish.
Color Theory for Jelly Nails
Understanding color theory enhances jelly nail results by helping you choose combinations that create beautiful custom shades through layering. Complementary colors often create muddy results when layered, while analogous colors (colors next to each other on the color wheel) blend beautifully to create sophisticated gradient effects and custom hues.
The translucent nature of jelly nails means that layering order affects final results starting with lighter colors and building with darker tones typically produces better results than the reverse. Experimenting with different layering sequences using the same colors can create multiple distinct looks from a limited color palette.
Frequently Asked Questions
How many coats do jelly nails typically require?
Most jelly nails require 3-4 thin coats to achieve proper opacity and depth. The translucent nature means building coverage gradually produces better results than attempting fewer thick applications that can become streaky or uneven.
Can I create jelly nails with regular nail polish?
While some DIY methods involve diluting regular polish, true jelly nails require specialized formulations designed for translucent effects. Diluting regular polish often produces disappointing results with poor longevity and uneven coverage.
How long do jelly nails last compared to regular manicures?
Properly applied jelly nails typically last 7-12 days, similar to regular manicures. The multiple layers can actually provide additional durability, and minor chips often blend naturally into the translucent appearance.
Are jelly nails suitable for short nails?
Jelly nails work beautifully on short nails and can actually make them appear longer by creating depth and dimension. The translucent effect doesn’t require length to look sophisticated and polished.
Do jelly nails work with nail art?
Jelly nails provide excellent foundations for nail art, particularly techniques that take advantage of their translucent properties like gradients, layering effects, and dimensional elements that show through the translucent base.
Can I mix different jelly nail colors?
Yes! Mixing and layering different jelly nail colors creates unique custom shades and artistic effects. Understanding color theory helps predict results and avoid muddy combinations that don’t photograph well.
Conclusion
Jelly nails represent the perfect intersection of Korean beauty innovation and accessible DIY nail art that defines 2025’s most compelling beauty trends. This translucent technique offers endless creative possibilities while remaining achievable for beauty enthusiasts of all skill levels and budgets.
The glass-like, luminous effect creates Instagram-worthy results that photograph beautifully while providing versatility for any occasion or personal style preference. The investment in quality jelly nail products and proper application techniques pays dividends through multiple stunning manicures and the confidence that comes from mastering a trending technique.
Whether you choose subtle nude variations perfect for professional settings or embrace bold artistic layering effects for special occasions, jelly nails provide the perfect canvas for personal expression that captures light and attention wherever you go.
Start your jelly nail journey today and discover how this translucent trend can transform your fingertips into luminous, glass-like masterpieces that reflect your unique style and creativity your most radiant self is waiting to shine through your perfectly polished fingertips.

