Halloween Nails Acrylic: Spooky Designs, Tips & Trends for 2025
You’ve got a Halloween party coming up, and your outfit is perfect but your nails? They’re boring. Plain nails won’t cut it when everyone else is showing off intricate, spooky manicures that steal the spotlight. You know halloween nails acrylic designs could be your answer, but where do you start? With so many styles, techniques, and design options flooding social media, it feels overwhelming to choose the right look that matches your vibe and lasts through all the festivities.
The frustration grows when you realize DIY attempts often chip within days, or worse, look amateur compared to professional work. You’ve seen those jaw-dropping 3D spider webs, ombre pumpkin fades, and blood-drip effects online, but achieving them seems impossible. Time is ticking, your event is approaching, and you need a solution that delivers salon-quality results without breaking the bank or requiring expert-level skills.
Here’s the fix: halloween nails acrylic designs offer durability, versatility, and endless creative possibilities that regular polish simply cannot match. Acrylic nails provide the perfect canvas for intricate Halloween nail art, lasting 3-4 weeks while maintaining their spooky glamour. This guide walks you through everything from choosing the right acrylic Halloween nail designs to application techniques, trending styles for 2025, and maintenance tips that keep your manicure flawless through every costume party, trick-or-treating adventure, and haunted house visit.
What Makes Halloween Nails Acrylic the Ultimate Choice for Spooky Season?
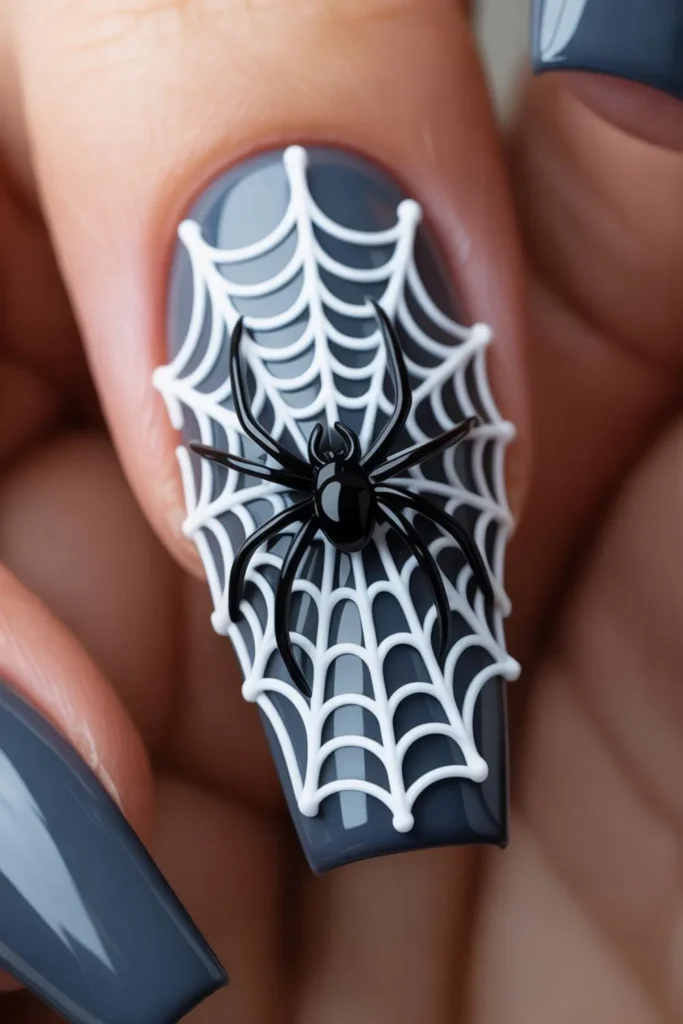
Halloween nails acrylic designs dominate the seasonal beauty scene because they combine strength with artistic flexibility. Unlike gel or regular polish, acrylic nails for Halloween create a sturdy foundation that supports elaborate 3D elements, heavy embellishments, and complex color layering without chipping or breaking. The acrylic application process bonds powder and liquid monomer to form a hard protective layer over your natural nails, extending length while providing structural integrity for intricate Halloween nail art.
The real magic happens in customization potential. Acrylic Halloween nails allow nail technicians to sculpt shapes impossible with natural nails think sharp stiletto tips perfect for witch claws, coffin shapes ideal for gothic elegance, or almond silhouettes that complement any spooky nail designs. You can embed rhinestones, create textured surfaces, build 3D sculptures, and layer multiple colors without worrying about the base weakening. This durability means your Halloween acrylic nails survive hand-washing, costume changes, and late-night festivities while looking freshly manicured.
Why Do Acrylic Nails Outperform Other Options for Halloween Designs?
Acrylic nails trump gel and dip powder for Halloween manicure projects due to superior longevity and repair-friendly properties. While gel polish lasts 2-3 weeks maximum, halloween nails acrylic applications maintain their integrity for 4-6 weeks with proper care. When a nail breaks or chips, acrylics can be spot-fixed without redoing the entire set crucial when you’ve invested hours in detailed Halloween nail designs acrylic artwork. The curing process doesn’t require UV lamps like gel systems, making acrylic Halloween manicures more accessible for home application.
The thickness of acrylic overlay provides an ideal surface for nail stamping, hand-painting, and airbrushing techniques that create those viral spooky acrylic nails you see trending every October. Professional nail artists prefer acrylics for Halloween themed nails because the material stays workable longer during application, allowing precise detail work on complex designs like miniature jack-o’-lanterns, realistic spider webs, or gradient ghost silhouettes. This extended working time translates to better results whether you’re attempting cute Halloween nails or going full horror with blood splatter effects and creepy crawly embellishments.
See More : Halloween Nails 2025 USA: 60+ Spooky Design Trends That Are Taking Over This Season
How Can You Choose the Perfect Halloween Nails Acrylic Design for Your Style?
Selecting your ideal halloween nails acrylic look starts with identifying your personal aesthetic and the events you’re attending. Classic Halloween nail ideas revolve around traditional symbols pumpkins, witches, black cats, and haunted houses rendered in orange, black, purple, and green color schemes. These timeless Halloween acrylic nail designs work beautifully for family-friendly gatherings, school events, and traditional costume parties where you want recognizable festive elements without shocking intensity.
For edgier preferences, spooky nails acrylic designs lean into horror themes with realistic gore effects, skeletal patterns, and dark gothic elements. Think deep burgundy bases with black lace overlays, matte black coffin nails featuring silver spider webs, or blood-red tips with drip effects cascading down nude bases. These Halloween nail art ideas suit haunted house visits, adult costume parties, and anyone embracing the darker side of the holiday. Consider your comfort level with attention-grabbing designs 3D Halloween nails with protruding elements catch eyes but may interfere with daily tasks like typing or cooking.
What Are the Trending Halloween Nails Acrylic Styles for 2025?
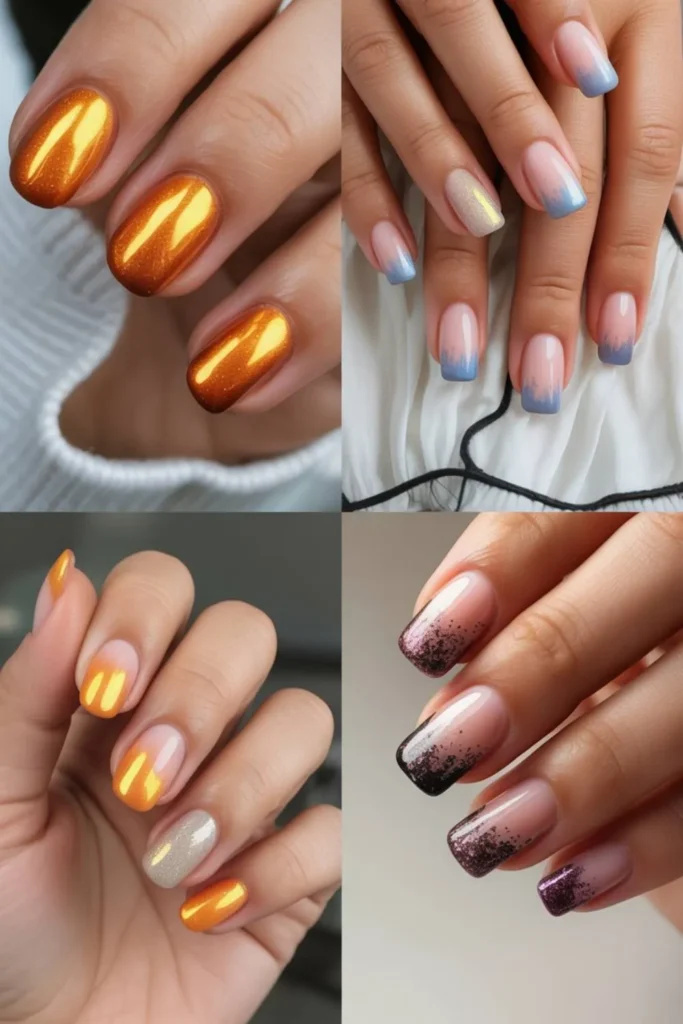
This year’s halloween nails acrylic trends blend nostalgia with modern techniques, creating fresh takes on classic themes. Glazed pumpkin chrome nails top the list, featuring iridescent orange finishes that shift colors under different lighting, mimicking the glossy surface of freshly carved jack-o’-lanterns.
These Halloween chrome nails pair metallic shine with traditional seasonal colors, offering sophistication alongside spooky vibes. The chrome powder application over orange acrylic bases creates dimensional effects that photograph beautifully for social media posts.
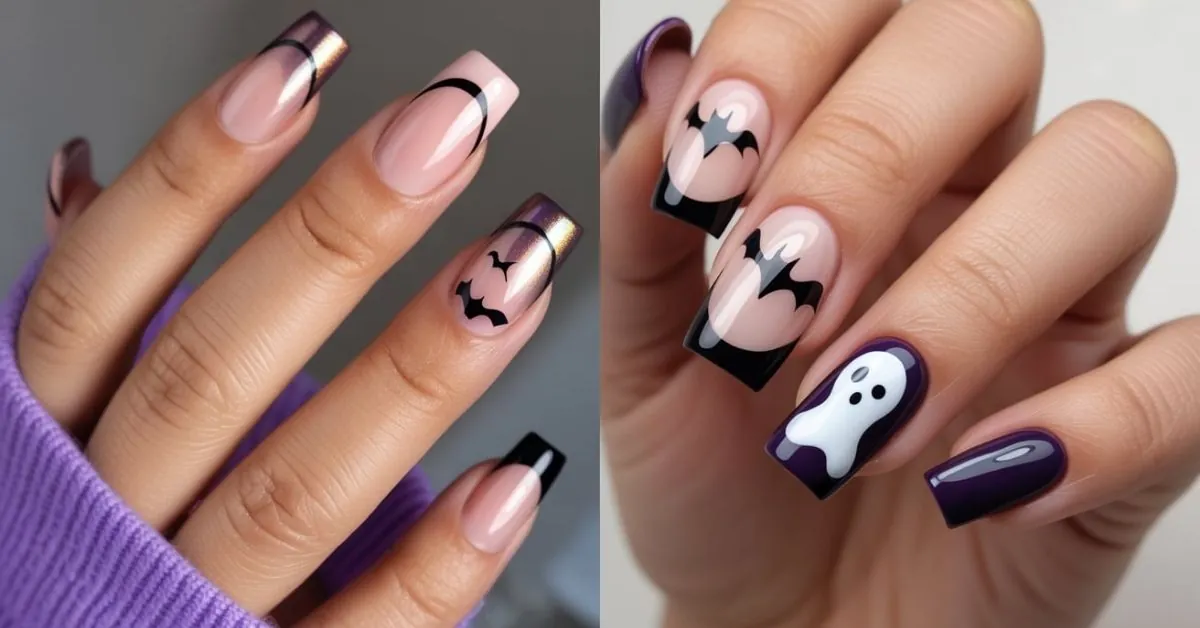
Microfrench Halloween tips represent another major trend, where thin colored tips in black, orange, or purple replace traditional white French manicure lines. Nail artists enhance these Halloween French tips with tiny bats, stars, or spiderwebs painted along the smile line, creating subtle seasonal nods perfect for workplace-appropriate Halloween manicures.
Negative space designs also surge in popularity, using bare or nude nail sections to create ghost silhouettes, skeletal hand bones, or crescent moons against colored backgrounds. These minimalist Halloween nails acrylic designs appeal to those wanting festive flair without overwhelming visual complexity.
Ombre fade techniques dominate 2025’s acrylic Halloween nail art, transitioning from deep blacks to vibrant oranges, purples to greens, or even color-shifting thermals that change with temperature. Glitter gradients add sparkle to these fades, concentrating at tips or cuticles for added dimension.
Textured acrylics incorporating matte topcoats, velvet powders, or sugar effects create tactile interest imagine matte black bases with glossy blood drips or velvet purple backgrounds highlighting glittery spiderwebs. These Halloween acrylic nail ideas combine multiple techniques for Instagram-worthy results.
See More : 85+ Velvet Matte Nails Autumn Designs That Define 2025’s Coziest Trend
Which Color Combinations Work Best for Halloween Nails Acrylic Projects?
Traditional halloween nails acrylic palettes center on black and orange combinations, the quintessential Halloween color duo representing night and harvest. Reverse these with orange bases and black detailing for pumpkin-inspired nails, or create checkerboard patterns alternating both shades for retro appeal.
Black chrome Halloween nails add modern edge to classic darkness, while burnt orange acrylics offer softer, autumn-appropriate alternatives to bright pumpkin shades. These combinations work across all nail lengths and shapes, making them universally flattering Halloween nail color choices.
Purple and green pairings evoke witchy, mystical energy perfect for spooky season nails. Deep eggplant purples paired with lime green accents create bold contrast, while pastel lavenders with sage greens offer softer, whimsical takes on Halloween themed acrylic nails. Metallic greens suggest toxic potions and alien encounters, especially when combined with black bases. White and black combinations deliver striking gothic elegance think skeletal designs, ghostly apparitions, or minimalist line art on contrasting backgrounds. These monochrome Halloween nails photograph exceptionally well and suit professional environments.
Blood red and nude combinations dominate horror-inspired halloween nails acrylic designs, creating realistic gore effects and vampire aesthetics. The nude base mimics skin tones, making red drips and splatters appear disturbingly lifelike.
Burgundy and gold pairings add luxury to seasonal designs, perfect for sophisticated Halloween events. Neon accents in toxic green, electric purple, or radioactive orange inject modern energy into traditional themes, especially effective under black lights at parties. Consider your wardrobe colors when selecting Halloween nail polish shades your acrylic Halloween manicure should complement your costume or party outfit.
How Do You Properly Prepare Natural Nails for Halloween Nails Acrylic Application?
Successful halloween nails acrylic application begins with thorough nail preparation ensuring optimal adhesion and longevity. Start by removing existing polish completely using acetone-based remover, then wash hands with antibacterial soap to eliminate oils.
Push back cuticles gently with a wooden stick or metal pusher never cut them, as this creates infection risks. Trim natural nails to your desired length, keeping them relatively short if you’re applying acrylic nail extensions for dramatic Halloween stiletto nails or coffin-shaped acrylics.
Buffing the nail surface creates texture for better acrylic bonding. Use a 180-grit file to gently remove shine from the nail plate, working in one direction to avoid damage. This step is crucial for long-lasting halloween nails acrylic sets skipping it causes lifting within days.
Dust away filing debris with a clean brush, then wipe nails with nail prep solution or rubbing alcohol to dehydrate the surface. Some technicians apply acid-free primer at this stage to further enhance adhesion, though quality acrylic systems often bond effectively without it. Ensure complete dryness before proceeding to acrylic application.
For Halloween press-on nails using acrylic techniques, the preparation remains identical. Size each press-on to match your natural nail width, filing sides if necessary for perfect fit. Apply nail glue or acrylic adhesive to both the press-on and natural nail, pressing firmly for 30 seconds to eliminate air bubbles.
The solid foundation created through proper prep ensures your intricate Halloween nail designs remain intact through weeks of activities, preventing frustrating early lifting or breakage that ruins carefully crafted spooky nail art.
See More : Metallic Chrome Nails USA: 2025’s Most Luxurious Nail Trend
What Essential Supplies Do You Need for Creating Halloween Nails Acrylic at Home?
Building your halloween nails acrylic toolkit requires specific products beyond basic manicure supplies. Purchase acrylic powder in clear, white, and your chosen colors black, orange, and purple cover most Halloween designs. Quality matters here; professional-grade powders from brands like Young Nails or Mia Secret cure properly and resist yellowing. Acquire acrylic liquid monomer compatible with your powder system, as mismatched products cause improper curing. A dappen dish holds monomer during application, while a ceramic or glass dish is preferred over plastic to prevent chemical reactions.
Invest in quality acrylic brushes specifically Kolinsky sable brushes in sizes 8-12 for general application and smaller detail brushes for intricate Halloween nail art acrylic work. These brushes hold liquid better and maintain their shape through repeated monomer exposure. Nail forms or tips provide the foundation for extensions; dual forms work well for beginners creating Halloween acrylic nails at home. Include various grits of nail files (100-grit for shaping, 180-grit for surface work, 240-grit for fine smoothing) and a buffer block for achieving glass-smooth finishes before polish application.
For Halloween nail decorations, stock nail art brushes in liner and detail sizes, dotting tools in multiple dimensions, and stamping plates featuring seasonal designs. Gather rhinestones, studs, glitter, and 3D embellishments like tiny pumpkins or spider charms. Nail glue secures decorations, while matte and glossy topcoats provide finishing options. Don’t forget cuticle oil for maintenance and acetone for removal. This comprehensive supply list enables endless halloween nails acrylic creativity, from simple solid colors to elaborate multi-technique spooky manicures rivaling salon results.
Can You Create Professional-Looking Halloween Nails Acrylic Designs Without Salon Experience?

Absolutely halloween nails acrylic designs are achievable at home with practice, patience, and proper technique. Begin with simpler Halloween nail ideas like solid colors with stamped designs before attempting complex hand-painted scenes or 3D sculptures.
Nail stamping revolutionizes DIY Halloween nail art, allowing beginners to transfer professional-looking images instantly. Choose Halloween stamping plates featuring bats, spiderwebs, pumpkins, and skeletal patterns, then practice the pickup and transfer motion on practice wheels before working on actual acrylic nails.
Stickers and decals provide another beginner-friendly path to impressive halloween nails acrylic results. Apply base colors, cure or dry completely, then position Halloween nail stickers strategically for instant detail.
Seal with topcoat to blend edges seamlessly. Water slide decals offer photorealistic images from horror movie characters to intricate graveyard scenes that look hand-painted. These tools bridge the skill gap, letting novices create salon-quality Halloween nails while developing freehand painting abilities gradually.
Master basic acrylic nail application before adding complex Halloween designs. Practice proper bead consistency too wet causes flooding, too dry creates lumps. Work in thin layers, building gradually rather than applying thick globs that take forever to cure and yellow over time.
YouTube tutorials specifically covering halloween nails acrylic techniques demonstrate expert methods you can replicate. Join online communities where nail artists share Halloween nail designs step-by-step, troubleshoot common problems, and provide feedback on your work. With dedicated practice, your DIY Halloween acrylic nails will rival professional work within a few attempts.
What Step-by-Step Process Creates Flawless Halloween Nails Acrylic Every Time?
Creating perfect halloween nails acrylic follows a methodical process ensuring professional results. After completing nail preparation, apply nail tips or forms to extend length if desired.
For tips, apply thin nail glue layer, press firmly, and trim to desired length before blending the seam with a 180-grit file. For forms, position them securely under the natural nail’s free edge, ensuring no gaps that cause product seepage. This foundation determines your final Halloween nail shape coffin, stiletto, almond, or square so take time perfecting placement.
Mix your acrylic application by dipping your brush into monomer, wiping excess on the dish rim, then touching the damp brush to acrylic powder. The ideal bead resembles a small wet pearl, neither dripping nor dry.
Place this bead at the cuticle area of one nail, then use your brush to pat and smooth it toward the free edge, building the acrylic nail structure. Work quickly but deliberately acrylic sets fast.
Apply a second bead at the stress point (where the natural nail ends) for strength, then a final bead at the free edge. Smooth everything into a seamless surface before the product hardens completely.
Once all nails have acrylic overlays or extensions cured completely (usually 2-3 minutes), begin shaping with a 100-grit file. Create your chosen silhouette, refine edges, and ensure even thickness across all nails. Switch to 180-grit for surface smoothing, removing any bumps or ridges.
Buff with 240-grit for a silky finish, then dust thoroughly. Now apply your Halloween nail designs whether painting jack-o’-lanterns, applying chrome powder, or creating ombre effects. Seal everything with appropriate topcoat (matte for gothic vibes, glossy for traditional shine), apply cuticle oil, and your stunning halloween nails acrylic masterpiece is complete.
See More : Sweater Texture Nails Design: 50+ Cozy Cable Knit Manicure Ideas for 2025
Which Specific Halloween Nail Art Techniques Elevate Your Acrylic Designs?
Ombre gradients rank among the most popular halloween nails acrylic techniques, creating smooth color transitions that add sophistication to spooky themes. Achieve this by applying your darkest shade at the tips, then using a makeup sponge dabbed in lighter colors to blend upward toward cuticles.
The acrylic base provides the smooth surface necessary for seamless fading. Halloween ombre nails work beautifully with black-to-orange transitions, purple-to-black fades, or green-to-black witchy gradients. Seal with topcoat and buff smooth for glass-like finishes.
3D acrylic sculpting transforms flat Halloween nail designs into tactile art pieces. Mix colored acrylic powder with monomer to create thick, moldable paste, then shape it into pumpkins, spiders, bats, or ghosts directly on the nail surface.
This technique requires practice controlling acrylic consistency too wet won’t hold shape, too dry cracks when molded. Start with simple shapes like round pumpkin bodies before attempting detailed spider legs or intricate witch hats. These raised elements catch light dynamically, creating Halloween acrylic nails with dimensional impact that photographs exceptionally well.
Reverse stamping enables multicolored Halloween nail art with crisp details. Paint colors onto your stamping plate’s design, scrape away excess, then pickup the image with your stamper. Before transferring to the nail, fill in different design sections with various colors using a detail brush.
This creates Halloween nail designs acrylic with multiple hues in a single stamped image think orange pumpkins with green stems and black faces. Encapsulation techniques suspend Halloween glitter, dried flowers, or tiny charms between acrylic layers, creating snow-globe effects. These advanced methods distinguish exceptional spooky nails acrylic from basic designs.
How Long Do Halloween Nails Acrylic Last and What Affects Their Longevity?
Quality halloween nails acrylic applications last 3-4 weeks before requiring fills, though growth becomes visible around the two-week mark. Proper application technique significantly impacts longevity correct acrylic-to-liquid ratio, thorough nail preparation, and avoiding cuticle flooding all extend wear time.
Your natural nail growth rate determines how quickly the gap appears between cuticles and acrylic overlay; faster-growing nails need fills sooner. Lifestyle factors matter too frequent hand washing, exposure to harsh chemicals, and intensive manual work stress Halloween acrylic nails more than sedentary activities.
Nail care habits directly influence halloween nails acrylic durability. Moisturizing cuticles daily with cuticle oil prevents lifting by keeping the nail bed flexible and hydrated. Wearing gloves during cleaning, dishwashing, or gardening protects acrylic Halloween manicures from chemical damage and physical trauma.
Avoid using nails as tools opening cans, scratching off stickers, or picking at things causes breakage and lifting. These protective behaviors keep your Halloween nail designs pristine through multiple events rather than requiring emergency repairs mid-season.
Proper removal prevents natural nail damage that shortens future halloween nails acrylic wear. Never peel or pick off acrylics, as this removes layers of your natural nail plate, creating thin, weak spots prone to breakage. Instead, soak nails in pure acetone for 15-20 minutes, gently scraping softened product away with an orangewood stick.
This process maintains nail health, ensuring your next Halloween acrylic nail application adheres properly and lasts its full duration. Rushing removal damages nails, creating a frustrating cycle of weak natural nails that can’t support long-lasting spooky nail designs.
What Common Mistakes Ruin Halloween Nails Acrylic and How Can You Avoid Them?
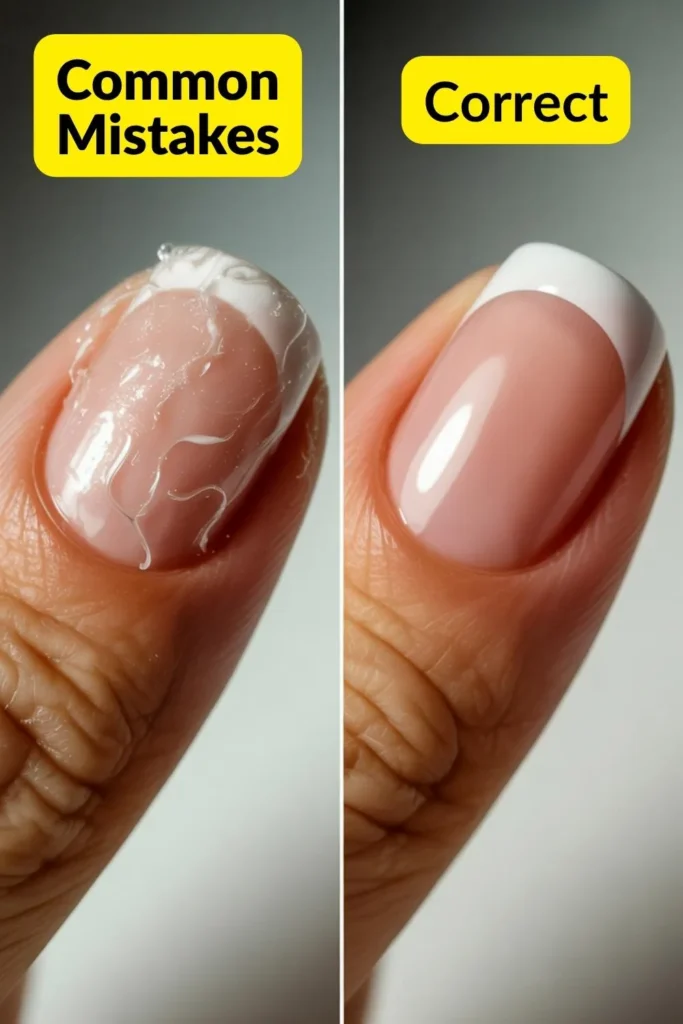
Over-filing natural nails tops the list of halloween nails acrylic mistakes, causing permanent nail bed damage. Excessive buffing thins the nail plate, creating painful sensitivity and increasing breakage risk.
File only enough to remove shine you should see a slightly matte surface, not visible thinning. Another critical error involves improper acrylic ratios. Too much liquid creates runny product that floods cuticles, causing lifting and infections.
Too little liquid makes dry, lumpy applications that yellow quickly and crack easily. Practice achieving the perfect pearl-sized bead consistency before attempting elaborate Halloween designs.
Rushing the curing process compromises halloween nails acrylic durability. Each bead needs 2-3 minutes to harden completely before filing or applying additional layers. Working on wet acrylic causes smearing and uneven surfaces. Conversely, working too slowly allows product to set before shaping, forcing excessive filing that creates heat and discomfort.
Find your comfortable working pace, completing one nail fully before starting the next. Skipping primer or dehydrator leads to early lifting, as oils between the acrylic and natural nail prevent proper bonding. These preparation products seem optional but dramatically extend Halloween acrylic nail wear time.
Poor topcoat application ruins otherwise perfect halloween nails acrylic designs. Thin, even coats prevent bubbling and ensure proper curing. Thick topcoat layers trap air, creating bubbles that mar your carefully executed Halloween nail art. Avoid topcoat on skin or cuticles cleanup becomes difficult once cured.
For matte Halloween nails, apply matte topcoat in thin layers; thick application appears streaky. Finally, neglecting cuticle care between fills causes painful hangnails and infections that necessitate premature acrylic removal. Daily cuticle oil application maintains nail health and keeps your spooky acrylic nails looking fresh throughout their wear period.
See More : 40 Stunning Earthy Brown Manicure Ideas That Define 2025’s Warmest Nail Trend
Where Can You Find Inspiration for Unique Halloween Nails Acrylic Designs?
Social media platforms overflow with halloween nails acrylic inspiration, each offering unique advantages. Instagram hashtags like #HalloweenNails, #AcrylicHalloweenNails, and #SpookyNails showcase millions of designs from nail artists worldwide. Follow professional nail technicians who share detailed process videos and product recommendations.
Pinterest excels for organizing ideas create boards separating cute Halloween nails, scary Halloween designs, and elegant Halloween manicures for easy reference. Search specific terms like Halloween coffin nails acrylic or Halloween stiletto nails to find shape-specific inspiration.
TikTok dominates for step-by-step halloween nails acrylic tutorials, with creators explaining techniques in real-time. The short-form video format breaks down complex designs into digestible steps perfect for beginners. Search Halloween nail hacks for time-saving tips and clever tricks.
YouTube offers longer, more comprehensive tutorials covering everything from basic acrylic application to advanced 3D Halloween nail art. Channels like “Nailcou” and “Young Nails” provide professional-level education free of charge. Subscribe to nail artists whose aesthetic matches your preferences.
Offline inspiration sources include fashion magazines featuring editorial Halloween content, costume stores displaying seasonal color schemes and themes, and horror movies offering character-specific Halloween nail ideas. Visit local nail salons to see current trend displays and consult technicians about achievable halloween nails acrylic designs for your skill level.
Nail art books available at craft stores provide timeless designs unaffected by social media algorithms. Combining online trends with classic motifs creates unique Halloween acrylic nail designs reflecting personal style rather than copying viral looks exactly.
How Do Different Nail Shapes Impact Your Halloween Nails Acrylic Aesthetic?
Coffin-shaped nails (also called ballerina nails) dominate halloween nails acrylic trends due to their gothic elegance. The tapered sides ending in squared tips create dramatic length ideal for elaborate Halloween nail art.
This shape provides ample canvas space for detailed scenes haunted houses, full moons with flying bats, or complex character portraits. Coffin Halloween nails suit those comfortable with longer lengths and deliver maximum visual impact at costume parties. The flat tip area allows intricate detail work impossible on rounded shapes.
Stiletto nails offer extreme drama perfect for witch-themed or vampire-inspired halloween nails acrylic designs. The sharp, pointed tips evoke claws, fangs, and dangerous elegance. While stunning,
Halloween stiletto nails prove impractical for daily tasks typing, buttoning clothes, and handling small objects become challenging. Reserve this shape for special events where appearance outweighs functionality.
The extended length accommodates ombre effects beautifully, transitioning from dark cuticle areas to bright, jewel-toned tips. Stiletto acrylic nails command attention and photograph dramatically.
Almond-shaped nails provide a versatile middle ground for halloween nails acrylic applications. The rounded tip tapers more gently than stilettos, offering elegance without extreme points. This universally flattering shape suits conservative workplaces while still providing adequate space for Halloween nail designs.
Almond Halloween nails work beautifully with French tip variations, ombre fades, and moderate embellishments. Square nails deliver modern edge with their straight-across tips and sharp corners. Perfect for geometric Halloween patterns, color-blocking designs, and minimalist seasonal nail art, square shapes feel contemporary and sophisticated while maintaining practical wearability.
See More : Cute Simple Fall Nails: 50+ Easy Designs for Autumn 2025
What Advanced Techniques Create Show-Stopping Halloween Nails Acrylic Masterpieces?
Encapsulation methods elevate halloween nails acrylic from pretty to professional by suspending elements between clear acrylic layers. Apply a thin clear acrylic base, position Halloween glitter, dried flowers, or tiny charms on the tacky surface, then cover with another clear acrylic layer.
This creates depth and dimension impossible with surface applications alone. Halloween encapsulated nails featuring suspended orange glitter, black spiders, or holographic flakes catch light dynamically, creating mesmerizing effects. The protective top layer ensures decorations remain perfectly positioned throughout the wear period.
Airbrushing techniques produce photorealistic gradients and detailed images unachievable with traditional painting. Specialized airbrush systems spray ultra-fine paint mists onto acrylic nails, creating seamless color transitions, realistic shadows, and intricate stenciled designs.
Airbrushed Halloween nails often feature full moon backgrounds, misty graveyards, or sunset silhouettes that look professionally printed. While equipment investment seems steep, the time savings and professional results justify costs for serious nail artists. Practice stencil positioning and pressure control on paper before attempting halloween nails acrylic applications.
Gel-acrylic hybrids combine both mediums’ benefits for superior Halloween nail designs acrylic results. Build structure with traditional acrylic, then apply gel polish for vibrant, long-lasting color that won’t stain the acrylic underneath. This technique works exceptionally well for chrome Halloween nails apply chrome powder over tacky gel topcoat for mirror finishes impossible with regular topcoat.
Builder gel can reinforce thin acrylic areas or create raised details with better control than thick acrylic paste. These hybrid approaches require understanding both systems thoroughly but produce Halloween acrylic nails with professional durability and artistic flexibility.
How Do You Maintain Halloween Nails Acrylic Between Salon Visits?
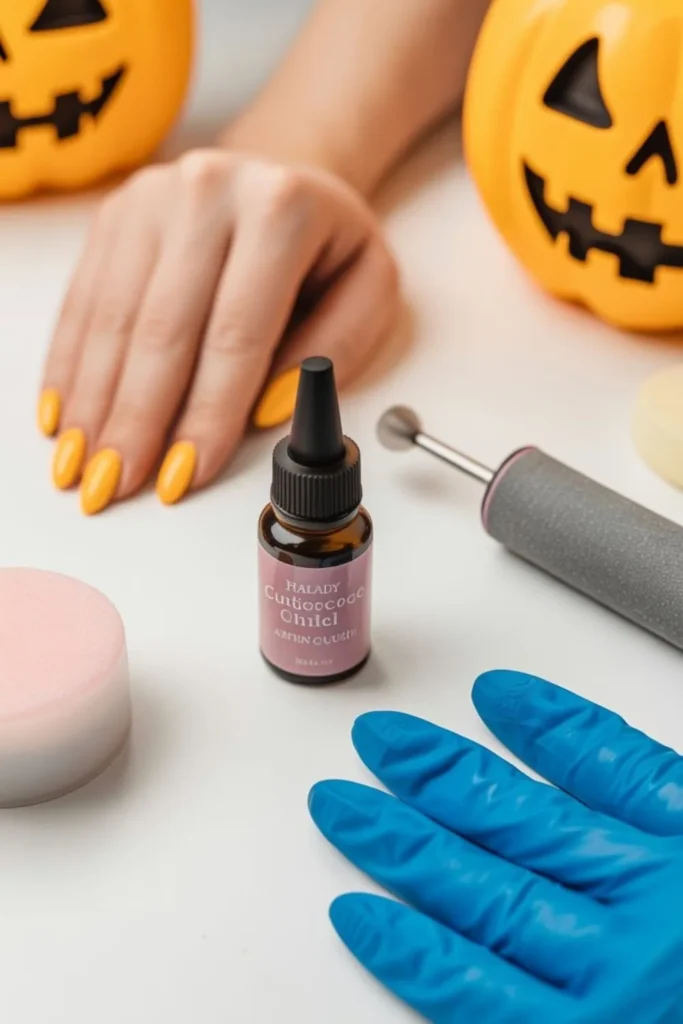
Daily cuticle oil application forms the foundation of halloween nails acrylic maintenance, preventing lifting by keeping nail beds moisturized and flexible. Apply oil morning and night, massaging gently into cuticles and surrounding skin.
This simple habit prevents painful hangnails and maintains the seal between acrylic overlay and natural nail. Carry a small cuticle oil pen for mid-day applications, especially after hand washing. Well-moisturized nails resist breakage better and maintain their glossy appearance longer than neglected Halloween acrylic nails.
Protective practices preserve halloween nails acrylic integrity throughout daily activities. Wear rubber gloves during cleaning, dishwashing, or any activity involving prolonged water exposure or harsh chemicals. Water softens acrylic structures temporarily, making them vulnerable to damage.
Chemicals in cleaners, hair products, and even some lotions can dull finishes or cause yellowing. Type with fingertip pads rather than nail tips to prevent stress cracks. Avoid picking at lifting edges this worsens the problem and introduces infection risks. Instead, schedule professional repairs promptly when lifting occurs.
Weekly maintenance checks catch small issues before they become major problems. Examine each halloween nails acrylic under good lighting for lifting signs, cracks, or dulling topcoat. Reapply topcoat at home if the shine diminishes, refreshing your Halloween nail designs appearance instantly.
Gently push back cuticles with an orangewood stick to prevent overgrowth that makes fills more difficult. Store nail care tools properly clean brushes after each use and maintain sharp files. These consistent maintenance habits extend the life of your Halloween acrylic nails, maximizing your investment while keeping hands looking impeccable throughout the spooky season.
See More : Burgundy Nails Design: 50+ Stunning Ideas That Are Dominating 2025
FAQ‘s
How much do halloween nails acrylic typically cost at salons?
Professional halloween nails acrylic services range from $50-$150 depending on design complexity, salon location, and technician experience. Basic solid colors with simple Halloween nail art start around $50-$70, while elaborate 3D designs, chrome finishes, or hand-painted scenes cost $100-$150. Urban areas charge premium rates compared to suburban salons. Intricate Halloween acrylic nail designs requiring 2+ hours of work justify higher pricing due to artistic skill and time investment involved.
Can you apply halloween nails acrylic over natural nails without extensions?
Yes, acrylic overlays work beautifully on natural nails without adding length. This technique strengthens weak nails while providing a smooth surface for Halloween nail designs. The process involves applying thin acrylic layers directly to prepared natural nails, offering durability without drama of long extensions. Halloween acrylic nails on natural length suit professional environments and those preferring practical manicures. Overlays last 3-4 weeks and protect natural nails from breaking while showcasing seasonal nail art.
What’s the safest way to remove halloween nails acrylic at home?
Safe halloween nails acrylic removal requires pure acetone, aluminum foil, cotton balls, and patience. Soak cotton balls in acetone, place on each nail, wrap with foil to trap heat, and wait 15-20 minutes. Gently push softened acrylic off with an orangewood stick never force or pry. Reapply acetone if product resists. Buff natural nails gently, apply cuticle oil generously, and avoid reapplication for 1-2 weeks to allow natural nail recovery from acetone exposure.
Are halloween nails acrylic safe during pregnancy?
Most doctors approve acrylic nail applications during pregnancy with proper precautions. Work in well-ventilated spaces to minimize monomer fumes exposure, avoid salons during first trimester when fetal development is most critical, and consider gel alternatives if sensitive to acrylic smells. Quality products from reputable brands contain safer formulations. Inform your manicurist about pregnancy so they can accommodate needs. If morning sickness worsens from fumes or discomfort arises, postpone halloween nails acrylic until feeling better.
How do you fix a broken halloween nails acrylic at home?
Emergency acrylic nail repairs require acrylic powder, monomer, a brush, and nail glue. For cracks, apply thin nail glue layer into the crack, let dry, then build over it with fresh acrylic. For breaks, trim away loose pieces, reshape the edge, and build a new tip using acrylic application techniques. Smooth with files, blend into existing Halloween designs, and seal with topcoat. Professional repairs ensure better results, but these emergency fixes maintain halloween nails acrylic temporarily until salon visits.
Can children safely wear halloween nails acrylic for costume parties?
Press-on nails offer safer Halloween nail alternatives for children under 16, as traditional acrylics may damage developing nail beds. Quality Halloween press-on nails applied with gentle adhesive last through parties without harsh chemicals. For older teens, short acrylic overlays applied by licensed professionals prove safer than DIY attempts. Prioritize nail health over length natural nail damage affects lifelong nail growth. Removable Halloween nail stickers provide adorable, safe options for young children wanting festive manicures.
Conclusion
Halloween nails acrylic transform ordinary manicures into wearable art that celebrates the spookiest season with style and durability. From classic pumpkin designs to avant-garde chrome finishes, acrylic applications provide the perfect foundation for expressing your Halloween spirit through stunning nail art that lasts weeks beyond a single party.
The techniques, tips, and design inspiration shared throughout this guide empower both beginners and experienced nail enthusiasts to create salon-quality Halloween acrylic nails at home while avoiding common pitfalls that compromise results.
Success with halloween nails acrylic comes down to proper preparation, quality products, and consistent maintenance practices that protect your investment. Whether you choose coffin-shaped gothic elegance, stiletto drama, or practical almond silhouettes adorned with seasonal motifs, your Halloween nail designs should reflect personal style while celebrating the creativity this holiday inspires.
Start planning your spooky nails acrylic now experiment with different techniques, gather your supplies, and prepare to showcase showstopping Halloween manicures that turn heads at every autumn gathering. Your perfect Halloween acrylic nails await, ready to complete your costume and capture the festive energy that makes October unforgettable.

