3D Nails: Stunning Dimensional Nail Art That Turns Heads
You’ve scrolled past countless flat nail designs, but now you’re craving something that literally stands out from the crowd. Traditional nail art feels basic compared to the jaw-dropping dimension of 3D nails that seem to leap right off your fingertips. You want nails that don’t just look amazing you want nails that people can’t stop staring at, touching, and asking about.
The frustration is real when you’re tired of cookie-cutter manicures that everyone else is wearing. Flat designs, no matter how intricate, can’t compete with the visual impact and tactile appeal of three-dimensional nail art. You deserve nails that reflect your creativity and make a statement wherever you go, but achieving that professional-level dimension seems impossible without extensive training or expensive salon visits.
This comprehensive guide transforms you into a 3D nail art master, whether you’re a complete beginner or looking to elevate your existing skills. You’ll discover professional techniques, trending designs, and insider secrets that create stunning dimensional effects.
From simple textured elements to complex sculptural masterpieces, we’ll cover everything you need to know about creating dimensional nail designs that rival salon work and express your unique style.
Understanding 3D Nail Art: Beyond Traditional Manicures
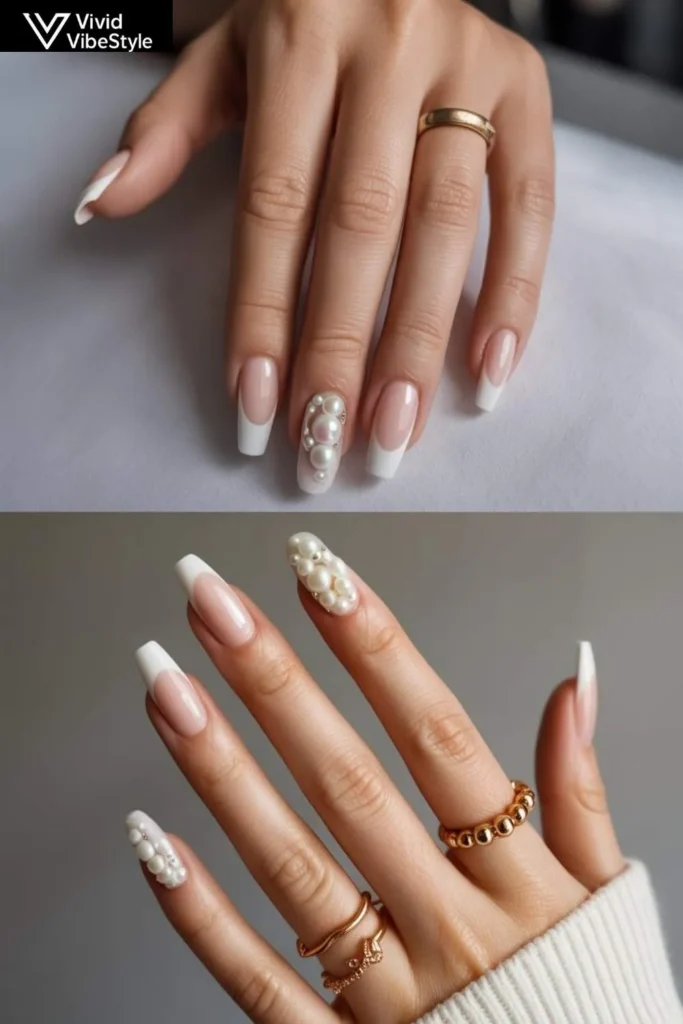
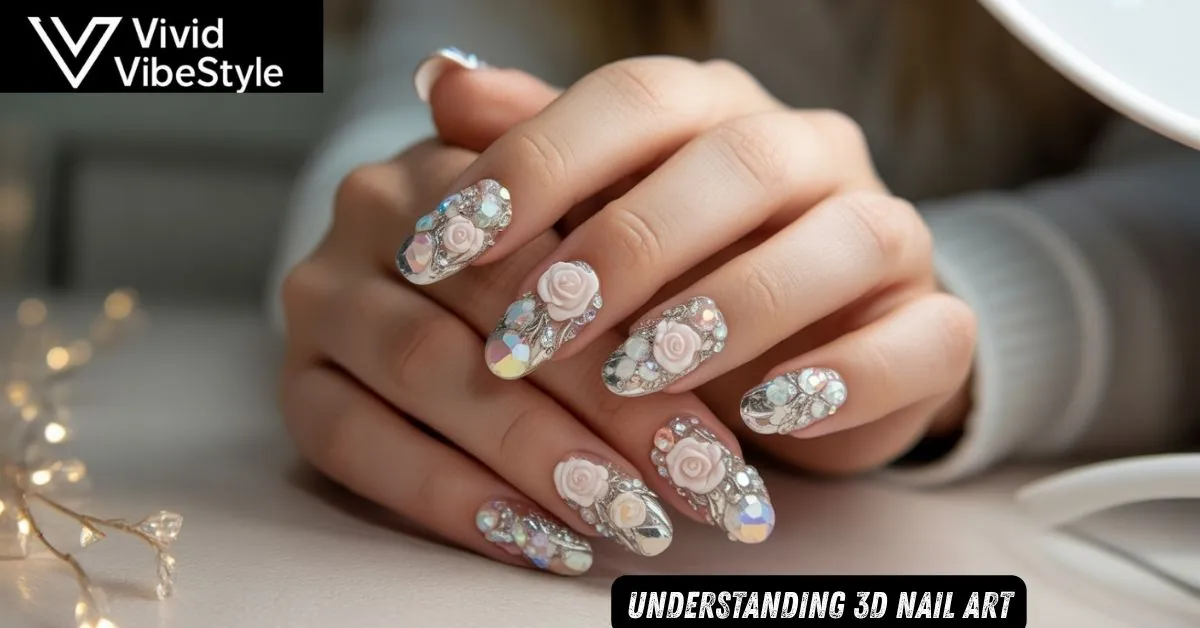
Three-dimensional nail art represents the evolution of traditional nail design, adding physical depth and texture that creates visual and tactile interest. Three-dimensional nail art can include all sorts of designs: bubbles, sea shells, rhinestones, and other patterns are all part of the 3d nail trend. This artistic approach transforms your nails into miniature sculptures that catch light, create shadows, and demand attention.
The key difference between regular nail art and 3D nail techniques lies in the physical elevation of design elements above the nail surface. While traditional nail art relies on color and pattern, 3D designs use height, texture, and form to create visual impact. This technique allows for endless creativity, from subtle raised dots to elaborate floral sculptures that seem to bloom directly from your nail bed.
Current 3D Nail Trends: What’s Dominating 2025
The world of dimensional nail art is experiencing unprecedented creativity and innovation. The nail trends of 2025 strike a perfect balance between nostalgia and futurism. Think chrome metallics, Y2K nail art and embellishments and 3D charms that are works of art in their own right, pushing the boundaries of what’s possible on such a small canvas.
“I’m absolutely loving 3D swirls and outlines right now. It’s a great option for anyone who wants to try something a little playful.” This trend combines artistic flair with wearable elegance, making it perfect for both special occasions and everyday glamour. In 2025, nail art is all about embracing 3D elements that make your manicure pop. Known as ‘Jelly art’, the technique sees salon-grade gel built up on the nails to create texture and structure.
Essential Tools and Materials for 3D Nail Creation
Success in three-dimensional nail art depends heavily on having the right tools and materials at your disposal. 3D nail art supplies range from basic items you might already own to specialized professional equipment that opens up advanced possibilities for your creative expression.
Start with fundamental supplies: nail sculpting gel, which maintains its shape without dripping, various sizes of rhinestones, beads, and charms for instant dimension, and precision brushes for detailed work.
High quality 3D nail art tools and products to create intricate designs make the difference between amateur and professional results. You’ll also need nail glue specifically designed for 3D elements, dotting tools for precise placement, and a good quality top coat to seal your masterpieces.
Read More About : Curvy Outfit Ideas for Every Body Figure: The Ultimate Style Guide to Flattering Fashion
How Do You Apply 3D Elements to Nail Polish?
The application process for dimensional elements requires patience, precision, and the right technique to ensure longevity and professional appearance. To create 3D designs, start with a base coat and apply your desired nail polish color. Let it dry completely. Use nail glue to attach 3D elements like rhinestones, beads, or sculpted acrylic designs.
Timing is crucial when working with dimensional elements your base color must be completely dry to prevent smudging or shifting during application. The 3D Nail Art Powder is essentially a fine substance that, when shaken over wet gel polish, mixes with the polish formula to ‘set’ the raised design into place.
This means you can paint any design you like onto your nails, and the 3D Powder will bring it to life. This innovative technique creates raised effects without the need for separate elements.
Beginner-Friendly 3D Techniques: Starting Your Dimensional Journey
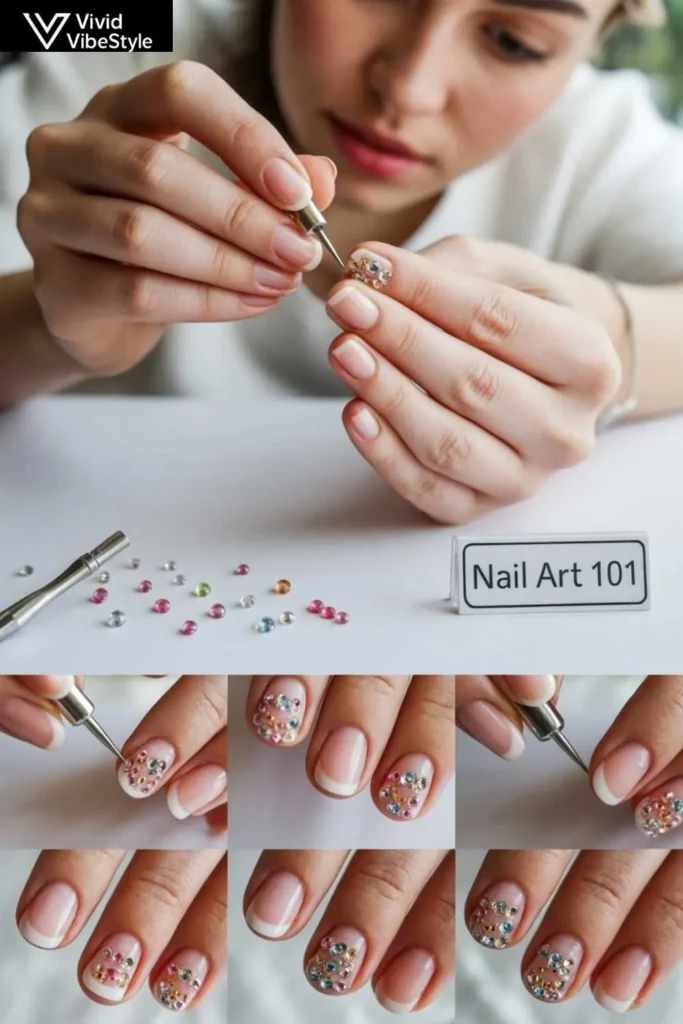
Your first foray into three-dimensional nail art doesn’t require advanced skills or expensive equipment. Easy 3D nail designs focus on simple techniques that create impressive results while building your confidence and familiarity with dimensional elements and application methods.
Begin with basic dotting techniques using thick gel polish to create raised dots in various sizes and patterns. Practice applying single rhinestones or small beads in simple patterns like diagonal lines or corner accents. To add even more dimension to your 3D nails, you can use a small brush or toothpick to add details or accents with nail polish. This could be adding dots, lines, or other designs to enhance your 3D decorations. These foundational skills prepare you for more complex dimensional designs.
Advanced 3D Sculpting: Creating Miniature Masterpieces
Once you’ve mastered basic dimensional techniques, advanced sculpting opens up limitless creative possibilities. Advanced 3D nail art requires more skill and patience but produces stunning results that truly showcase your artistic abilities and technical proficiency.
Layering: Building layers of Polygel or acrylic to create depth and dimension. Sculpting: Using tools to mold and shape the material into the desired design. These techniques allow you to create complex floral designs, architectural elements, or abstract sculptures that transform your nails into wearable art pieces. The key is building dimension gradually, allowing each layer to cure properly before adding the next level of detail.
What Are the Best Materials for Creating Durable 3D Nails?
Durability is crucial for three-dimensional nail art since raised elements are more susceptible to damage than flat designs. Durable 3D nail materials ensure your artistic efforts last as long as possible while maintaining their visual impact and structural integrity throughout daily activities.
Larger items such as large studs, large flat-back or pointed-back rhinestones, chains, beads, pearls, charms, fimo canes, and so on can either be attached using a bead of nail sculpting gel (it’s a form of thick gel and will keep it’s shape without dripping or sliding. Quality nail sculpting gel provides the strongest foundation for dimensional elements.
With the right products, such as a top coat without a dispersion layer and a transparent building gel, you can achieve three-dimensional patterns on nails.
Read More : Plus Size Wedding Guest Outfits: Your Complete Guide to Looking Stunning at Every Celebration
Design Inspiration: Popular 3D Nail Art Styles
The world of dimensional nail art offers endless inspiration, from nature-inspired designs to geometric patterns that showcase mathematical precision. Popular 3D nail designs range from subtle texture additions to elaborate sculptural elements that transform nails into miniature works of art.
Floral designs remain perennially popular, with roses, cherry blossoms, and tropical flowers leading the trends. Geometric patterns using raised lines and shapes create modern, architectural appeal.
Ocean-inspired themes featuring shells, pearls, and wave textures connect with beach and mermaid aesthetics. Abstract designs allow for pure creative expression without the constraints of representational accuracy.
Professional vs. DIY: When to Visit a Salon vs. Creating at Home
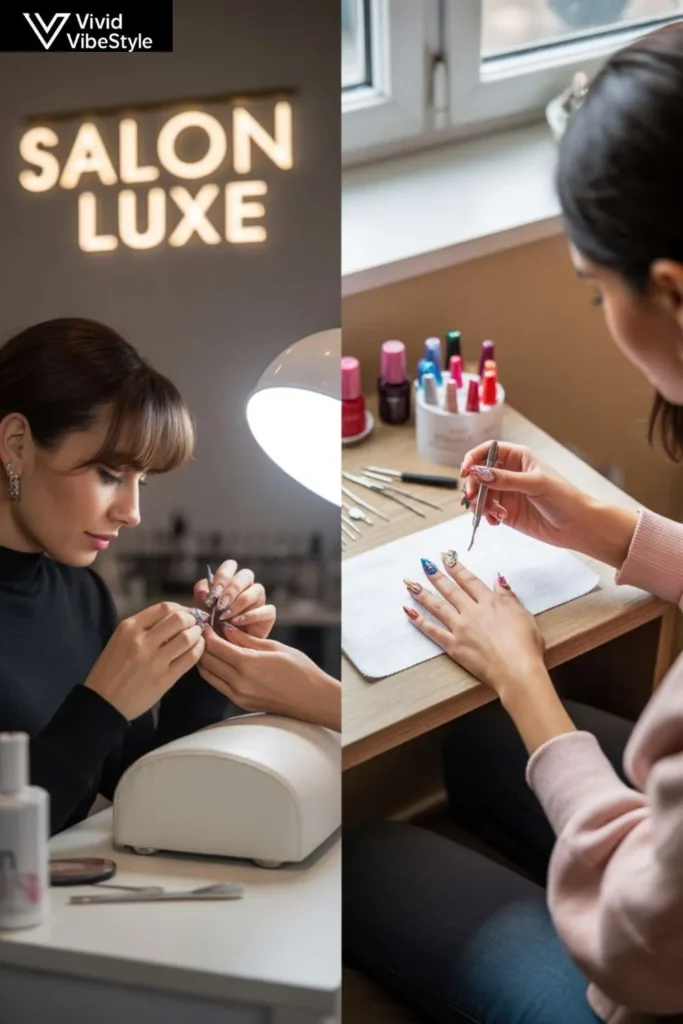
Deciding between professional application and DIY creation depends on your skill level, available time, and desired complexity. DIY 3D nails can achieve stunning results for many designs, while complex sculptural work may require professional expertise and specialized equipment.
Home creation works best for simple dimensional elements like rhinestone patterns, basic raised dots, or small charm applications. Professional services excel at complex sculptural work, intricate floral designs, or when you need guaranteed longevity for special events.
Consider your budget, time constraints, and desired outcome when making this decision. Many people combine both approaches, handling simple dimensional accents at home while visiting professionals for elaborate special occasion designs.
Maintenance and Care: Keeping Your 3D Nails Looking Fresh
Proper maintenance extends the life of your dimensional nail art while keeping it looking salon-fresh between appointments or touch-ups. 3D nail maintenance requires special attention to the raised elements that are more vulnerable to damage than traditional flat designs.
Avoid using your nails as tools, which can damage or dislodge dimensional elements. Wear gloves during cleaning or gardening to protect intricate designs. Apply cuticle oil regularly to keep the nail bed healthy, which provides a better foundation for dimensional elements. When dimensional pieces begin loosening, address them immediately to prevent further damage or loss.
Cost Considerations: Budgeting for 3D Nail Art
Understanding the financial investment required for quality dimensional nail art helps you make informed decisions about materials, tools, and professional services. 3D nail art costs vary significantly depending on complexity, materials used, and whether you choose DIY or professional application.
Basic DIY supplies including gel, rhinestones, and tools typically cost between $50-100 for a complete starter kit that creates multiple manicures. Professional 3D nail services range from $60-200 depending on complexity and location. Factor in the longevity of your investment quality tools and materials last for multiple applications, making the cost per manicure more reasonable over time.
Troubleshooting Common 3D Nail Problems
Even experienced nail artists encounter challenges when working with dimensional elements. Understanding common issues and their solutions prevents frustration while improving your overall success rate with three-dimensional designs.
Dimensional elements falling off usually indicates insufficient curing time, inadequate surface preparation, or using the wrong adhesive for the specific material. Uneven application often results from rushing the process or inadequate lighting during application.
Cloudy or dull finish typically stems from contamination during the curing process or using incompatible products together. Most problems resolve with patience, proper technique, and quality materials.
Read More About : Black and Silver Dresses: Timeless Elegance & Stunning Glamour
Frequently Asked Questions
How long do 3D nails typically last?
With proper application and care, 3D nails can last 2-4 weeks, similar to regular gel manicures. However, the dimensional elements may require touch-ups or replacement sooner than the base polish.
Can you do everyday activities with 3D nails?
Yes, but you’ll need to adjust some habits. Avoid using nails as tools, wear gloves for housework, and be mindful of dimensional elements when typing or handling small objects.
Are 3D nails suitable for short natural nails?
Absolutely! Many 3D techniques work beautifully on short nails. Focus on smaller dimensional elements and subtle textures rather than large sculptural pieces that might overwhelm shorter nails.
What’s the difference between 3D nail powder and regular nail art?
3D nail powder creates raised effects by mixing with wet polish to form dimensional patterns, while regular nail art remains flat on the nail surface using only color and pattern.
How do you remove 3D nail elements safely?
Soak nails in acetone to soften the adhesive, then gently push off dimensional elements with a cuticle pusher. Never force or pull elements off, as this can damage your natural nails.
Can 3D nails damage your natural nails?
When applied and removed properly, 3D nails shouldn’t damage your natural nails. However, improper application or aggressive removal can cause damage, so follow proper techniques or visit a professional.
Conclusion
Mastering 3D nails transforms your manicure game from ordinary to extraordinary, giving you the power to create stunning dimensional art that showcases your creativity and personal style.
Whether you choose simple rhinestone accents or complex sculptural designs, the techniques and principles covered in this guide provide the foundation for endless artistic exploration. The key to success lies in starting with quality materials, practicing basic techniques until they become second nature, and gradually building your skills toward more advanced dimensional creations.
The world of 3D nail art continues evolving with new techniques, materials, and design trends that push creative boundaries. By understanding proper application methods, maintenance requirements, and troubleshooting solutions, you’ll create dimensional nail art that rivals professional work while expressing your unique artistic vision.
Start with simple techniques, invest in quality tools and materials, and most importantly, enjoy the creative process of transforming your nails into miniature works of dimensional art that command attention and admiration wherever you go.
