3D Ghost Nails: The Ultimate Guide to Spooky-Chic Nail Art That Turns Heads
Your nail art game deserves an upgrade that’s equal parts adorable and eerie. 3D ghost nails have exploded across social media platforms, transforming ordinary manicures into miniature haunted masterpieces that capture attention wherever you go. These spooky nail designs aren’t just for Halloween anymore they’re a year-round statement for anyone who loves creative nail art with personality.
The problem? Most tutorials skip crucial steps or assume you’re already a nail technician. You end up with lumpy acrylic ghosts that chip within days or gel designs that look more blob than boo. The frustration builds when your Pinterest-perfect vision turns into a sticky mess on your fingertips.
This comprehensive guide solves that. You’ll master professional 3D nail art techniques, discover foolproof ghost nail designs, and learn exactly which nail products deliver salon-quality results at home. Whether you’re a beginner nail artist or experienced with dimensional nail art, you’ll find actionable methods to create stunning 3D ghost manicures that last.
What Makes 3D Ghost Nails Different from Regular Ghost Nail Art?
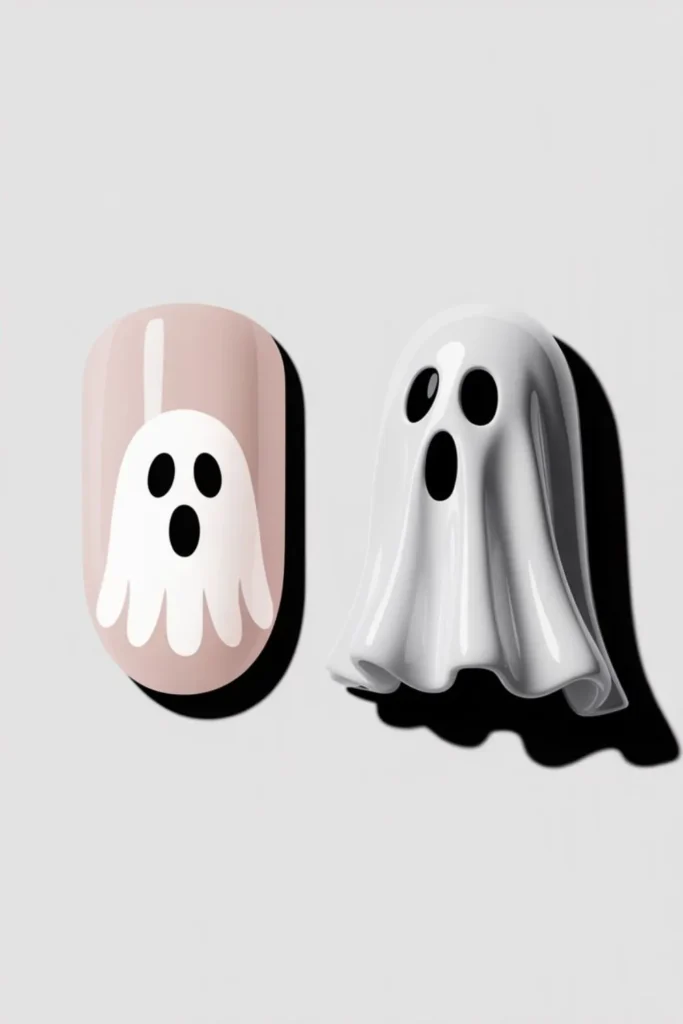
3D ghost nails stand apart through their dimensional construction and tactile elements. Unlike flat painted ghost designs or simple nail decals, these sculptural manicures feature raised ghost characters built with acrylic powder, builder gel, or specialized 3D nail embellishments. The ghosts literally pop off your nail surface, creating shadows and depth that catch light differently than traditional nail polish art.
The technique borrows from professional sculpting methods used in competition nail art. Nail artists layer materials to build height and shape, then refine details with tiny brushes and dotting tools. This three-dimensional approach transforms your nails into wearable miniature sculptures rather than canvases. The texture variation between the smooth nail base and raised ghost figures creates visual interest that flat designs can’t achieve.
Material choice significantly impacts the final result. Acrylic ghost nails offer the most durability and sculptural control, while gel-based 3D designs provide easier application for home users. Resin ghosts and pre-made 3D nail charms offer shortcuts without sacrificing the dimensional effect. Each material requires different curing methods and application techniques, but all produce that coveted pop-out ghost effect that makes these manicures so captivating.
How Do You Create 3D Ghost Nails Using Acrylic Powder?
Acrylic powder remains the gold standard for professional 3D ghost nails because of its workability and strength. Start with properly prepped natural nails or nail extensions push back cuticles, buff the nail surface, and apply a thin base coat. Mix white acrylic powder with monomer liquid to create a medium-consistency bead that holds shape but remains pliable for about 30 seconds.
Place your acrylic bead where you want the ghost body to sit. Use a dampened acrylic brush to shape the mixture into an oval or rounded form, creating the classic ghost silhouette. Work quickly but gently, pulling the material into a slight upward curve for dimension. The bead should be thick enough to stand proud of the nail surface by 2-3 millimeters but not so thick it feels bulky or catches on fabrics.
Add smaller acrylic beads for ghost arms or tail details before the main body fully hardens. Use a fine detail brush to blend edges where the ghost shape meets the nail base, creating a seamless transition. Once the acrylic sets completely, use black acrylic paint or gel polish to add eyes and mouth details with a striping brush or dotting tool. Seal everything with a high-gloss top coat that encapsulates the entire 3D ghost design without flattening its dimension.
See More : Dark Red Nails: 25+ Stunning Ideas For Your Chic Manicure
What Are the Best Gel Products for Building 3D Ghost Designs?
Builder gel has revolutionized home 3D nail art by eliminating harsh monomer fumes while maintaining sculptural capability. Hard builder gels like those from Gelish, Beetles, or Makartt work best for 3D ghost nails because they hold shape without sagging before curing. Look for high-viscosity gels specifically labeled for sculpting or 3D art these have thicker consistency than regular gel polish and won’t run when building vertical elements.
The application process differs from acrylic methods but achieves similar results. Apply a thin sticky base layer of builder gel and cure it under your UV/LED lamp for 30 seconds to create an adhesive foundation. Dispense a small amount of white builder gel directly onto your nail surface, then use a spatula tool or flat brush to shape your ghost form. Flash cure for 10-15 seconds to set the basic shape, then add more gel to build height and refine contours before a full 60-second cure.
Layering technique matters tremendously with gel 3D ghosts. Build in thin layers rather than one thick application this prevents under-curing and ensures durability. Some nail artists prefer clear builder gel as a base layer with white gel polish painted over the cured structure, which provides better control over opacity and finish. Always encapsulate your finished ghost design with a no-wipe top coat to seal details and add protective shine that lasts through daily wear.
Can You Use Nail Glue and Pre-Made Charms for Quick 3D Ghost Nails?
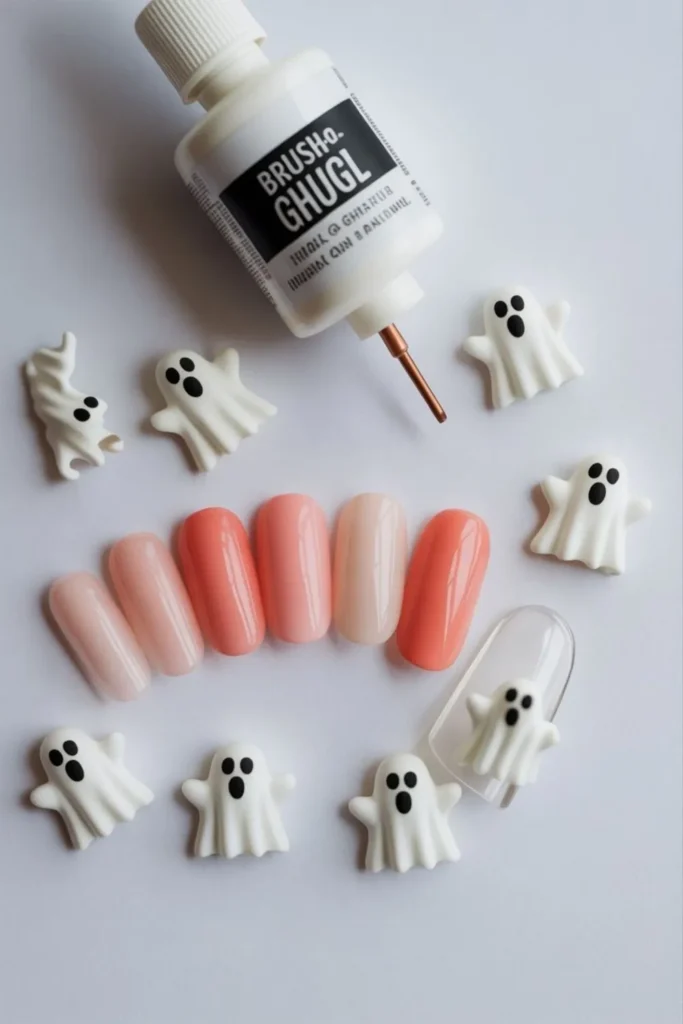
Pre-made 3D ghost charms offer the fastest route to dimensional ghost nail art without sculpting skills. These resin decorations or plastic embellishments come ready-shaped with painted details, requiring only proper attachment to achieve professional-looking results. Nail supply stores and online retailers stock hundreds of ghost charm variations from cute cartoon ghosts to elegant minimalist spirits that suit different aesthetic preferences.
Attachment method determines longevity. Nail glue works for temporary applications lasting 3-5 days, perfect for special events or testing designs. Apply a small dot of brush-on nail glue to both the charm base and your prepared nail surface, wait 5 seconds for it to become tacky, then press firmly for 10 seconds. For longer wear, embed ghost charms in builder gel or clear acrylic apply a thin layer of your chosen medium, press the charm into place, cure or allow to harden, then encapsulate with additional product around the edges.
The key challenge with pre-made ghost decorations involves proportion and placement. Oversized charms overwhelm smaller nail beds, while tiny ghosts get lost on longer nails. Position 3D elements strategically off-center placement toward the cuticle area or sidewalls often looks more intentional than dead-center positioning. Mix ghost charms with other Halloween nail embellishments like tiny pumpkins, bats, or spiderwebs for cohesive spooky nail designs that tell a visual story across all ten fingers.
See More : Winter Aura Nails: 45+ Ethereal Designs That Capture 2025’s Most Enchanting Manicure Trend
Which Base Colors Complement 3D Ghost Nail Designs Best?
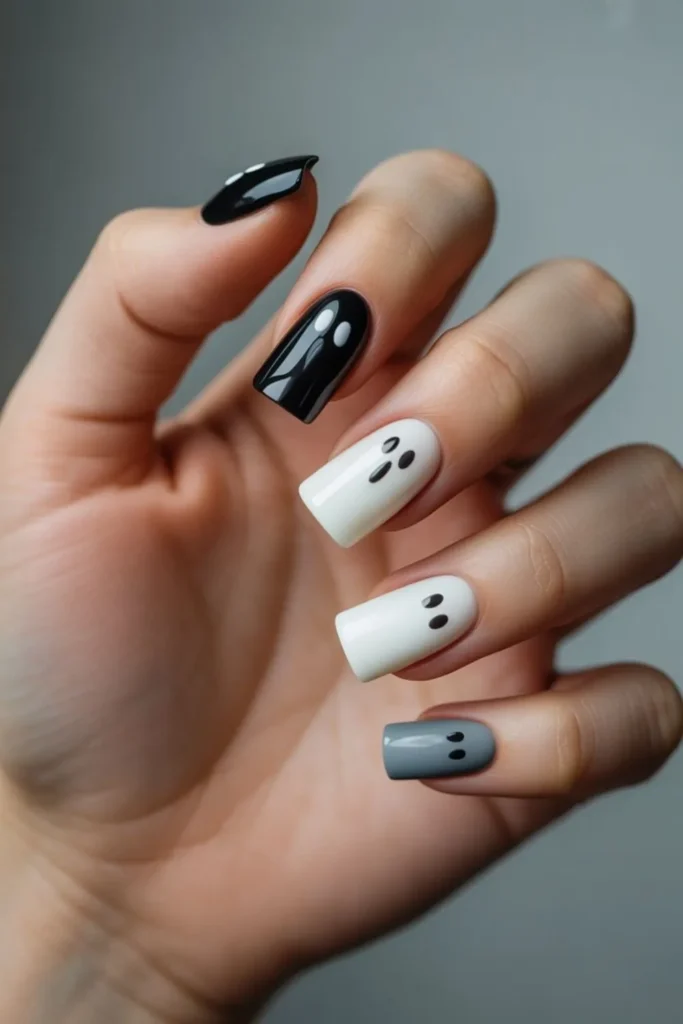
Color selection for your base manicure dramatically impacts how your 3D ghost nails read visually. Black nail polish creates maximum contrast for white ghost designs, making every dimensional detail pop with haunting clarity. This classic combination works for Halloween nail art but feels intentionally gothic year-round. Matte black base coats add sophistication, while glossy black finishes provide dramatic shine that complements shimmery ghost accents.
Purple nail polish in various shades offers versatility that black alternatives can’t match. Deep eggplant purples evoke mysterious midnight vibes perfect for spooky aesthetics, while lighter lavender bases create softer, more whimsical ghost manicures suitable for everyday wear. Ombre effects transitioning from dark purple at the cuticle to lighter lilac at the free edge add depth that enhances 3D ghost elements without competing for attention.
Unconventional base colors push ghost nail art into unexpected territory. Navy blue, forest green, or deep burgundy bases create moody Halloween manicures with unique character. Transparent or nude bases let your natural nail show through, making white 3D ghosts appear to float above your nail bed an ethereal effect perfect for minimalist nail designs. Holographic or iridescent base coats add magical dimension, especially when ghost characters are positioned to catch shifting light patterns throughout the day.
How Do You Add Facial Details to Make 3D Ghosts Look Expressive?
Ghost facial expressions transform basic shapes into characters with personality. The simplest approach uses black gel polish or acrylic paint applied with an ultra-fine detail brush or dotting tool. For classic cartoon ghosts, create two oval eyes and an open “O” mouth this timeless design reads immediately as friendly and approachable. Position eyes slightly asymmetrical or at different heights to add charm and prevent the rigid symmetry that feels manufactured.
Expressive variations expand your design repertoire beyond standard patterns. Try worried ghost faces with raised eyebrows and downturned mouths, surprised ghosts with wide eyes and tiny mouths, or mischievous spirits featuring winking eyes and crooked grins. Angry ghost designs with furrowed brows and frowning mouths create edgier Halloween nail art suitable for dramatic manicure statements. Use white gel paint or acrylic to add highlight dots within the eyes, creating sparkle that brings your ghost characters to life.
Advanced detailing techniques involve micro-painting with brushes containing just 1-3 bristles. Add tiny eyelashes, rosy cheeks using diluted pink polish, or translucent effects by mixing clear gel with the tiniest amount of white pigment to create semi-transparent ghost bodies. Some nail artists apply glow-in-the-dark gel polish for ghost elements that reveal themselves in darkness a showstopping effect for evening events. Layer matte top coat over certain ghost sections while keeping others glossy to create texture variation that reads as dimensional even in flat lighting.
What Tools Are Essential for Professional-Looking 3D Ghost Nails?
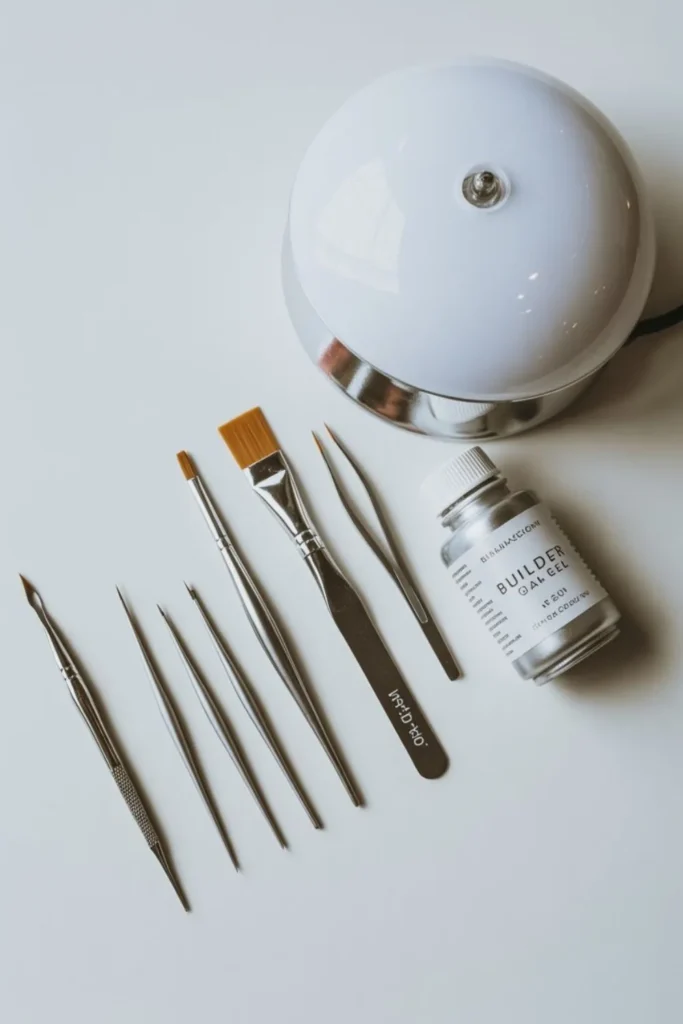
Quality tools separate amateur attempts from professional 3D ghost manicures. A fine-tipped detail brush (size 0 or 00) is non-negotiable for painting ghost faces with precision. Dotting tools in multiple sizes create perfect circular eyes and allow controlled placement of acrylic beads or gel dots. A silicone-tipped sculpting tool helps shape 3D ghost bodies before they cure or harden, providing the control needed for smooth curves and intentional angles.
Material-specific implements enhance your workflow significantly. For acrylic ghost nails, invest in a proper acrylic brush (size 8-10) with synthetic bristles that won’t deteriorate in monomer liquid. Gel workers need a flat builder brush and angular shaping brush to manipulate thick builder gel without creating bubbles or uneven surfaces. A cuticle pusher or orange stick helps position pre-made ghost charms precisely before adhesive sets, preventing crooked placement that ruins otherwise perfect manicures.
Support equipment rounds out your 3D nail art toolkit. A high-quality UV/LED lamp with sufficient wattage ensures complete curing of gel products undercured gel ghosts remain sticky or peel within days. Keep lint-free wipes and alcohol or gel cleanser for surface prep and removing tacky layers between steps. Tweezers with fine points grab tiny embellishments without fumbling, while a nail art palette or aluminum foil provides workspace for mixing acrylic or dispensing gel without wasting product. Proper tool maintenance cleaning brushes immediately after use and storing implements properly extends their lifespan and ensures consistent results across all your ghost nail designs.
See More : Simple Winter Nails: 40+ Effortless Minimalist Designs That Define 2025’s Chic Season
How Long Do 3D Ghost Nails Typically Last?
Longevity expectations for 3D ghost nails depend heavily on construction method and lifestyle factors. Acrylic-based 3D ghosts applied over gel polish or acrylic extensions typically last 2-3 weeks with proper care matching the standard wear time of professional gel manicures. The acrylic bonds permanently to the base layer, creating a durable structure that withstands daily activities. Gel-constructed ghosts using hard builder gel achieve similar durability when properly cured and encapsulated with protective top coat.
Adhesive-attached ghost charms have shorter lifespans, generally lasting 5-10 days depending on nail glue quality and daily wear patterns. Water exposure during dishwashing, handwashing, or swimming gradually weakens adhesive bonds, especially if charms weren’t fully encapsulated in gel or acrylic. Manual labor, typing, and phone use create mechanical stress that can dislodge poorly attached 3D elements. Reinforce charm attachment by applying builder gel or clear acrylic around the base edges, creating a seal that protects the adhesive joint from moisture and impact.
Maintenance practices significantly extend 3D ghost manicure lifespan. Apply cuticle oil daily to keep surrounding skin healthy without softening the nail structure. Wear gloves during cleaning tasks involving harsh chemicals. Avoid using your nails as tools opening cans, scratching surfaces, or peeling labels puts unnecessary stress on 3D elements. If a ghost detail chips or loosens, repair it immediately rather than letting damage spread. Keep nail oil and a small brush in your bag for quick touch-ups to ghost faces if paint wears from high-friction areas. With proper care, well-constructed 3D ghost nails maintain their appearance through weeks of normal wear.
What Are the Most Popular 3D Ghost Nail Design Variations?
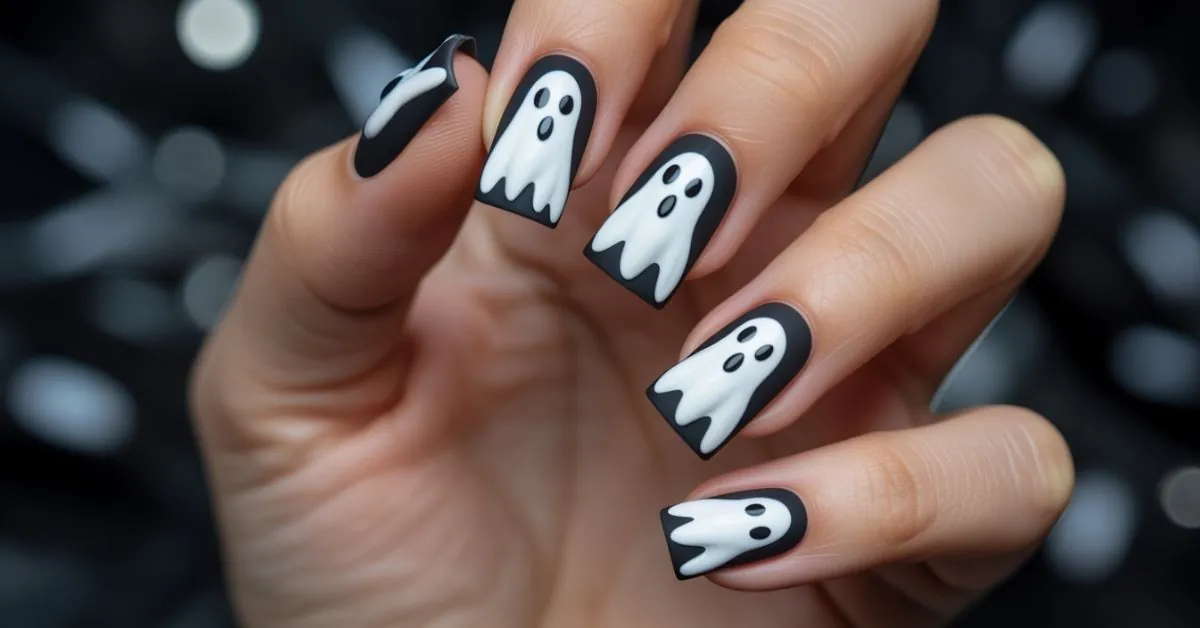
Classic white ghosts on black backgrounds dominate Halloween nail art searches for good reason the high contrast creates instant visual impact. This timeless combination works across nail lengths and shapes, from short square nails to long coffin nails. Many nail artists add variety by alternating ghost positions across fingers some facing forward, others in profile, creating a narrative of spirits floating across your manicure. Matte finishes give these designs sophisticated edge, while glossy top coats add playful shine.
Cute ghost variations dominate social media with their approachable charm. Baby ghosts clustered in groups, ghosts holding tiny pumpkins or candy, and ghost families with parent and child spirits all play into the kawaii aesthetic that makes Halloween nail designs wearable beyond October. Pastel ghost nails featuring pink, blue, or yellow ghost bodies against white or nude bases appeal to those wanting spooky elements without dark, gothic vibes. Glitter accents sprinkled around 3D ghosts create magical atmospheres perfect for festive occasions.
Advanced design concepts push creative boundaries for experienced nail artists. Ombre ghost effects where ghost bodies transition from white to transparent create ethereal, disappearing spirits. Textured ghosts built with sugar sand polish or velvet powder add tactile dimension beyond visual interest. Scene-building designs place 3D ghosts among painted graveyards, haunted houses, or full moons, creating miniature Halloween dioramas across your nail set. French tip ghost manicures position tiny spirits along the free edge, offering subtle spooky style suitable for conservative work environments that allow creative nail art within boundaries.
How Do You Prevent 3D Ghost Elements from Catching or Snagging?
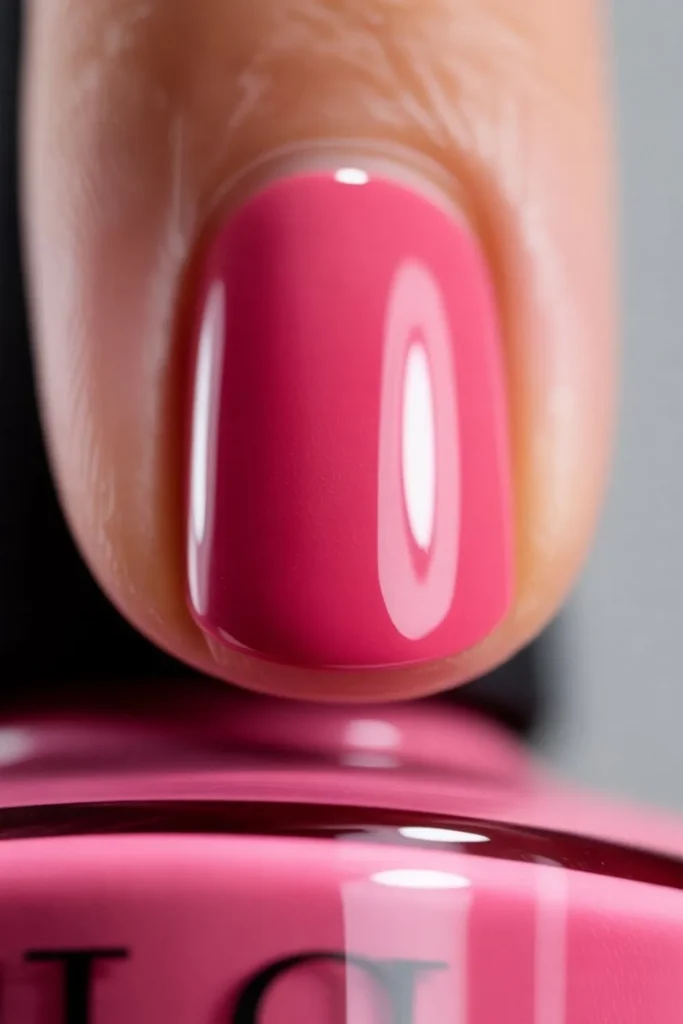
Snag prevention starts with proper ghost sizing and placement strategy. 3D elements should never exceed 3-4 millimeters in height above the nail surface taller structures catch on clothing, hair, and everyday objects. Position ghosts toward the center of the nail plate rather than near edges where they’re more likely to make contact with surfaces. Avoid placing 3D designs on your dominant hand’s pointer finger or thumb, which encounter the most physical contact during daily activities.
Edge finishing techniques dramatically reduce catching risks. After building your 3D ghost, carefully smooth all edges where the ghost base meets the nail surface using a dampened brush or sculpting tool. Create gradual transitions rather than sharp vertical walls that create catching points. Apply multiple thin layers of top coat, allowing each to flow around the 3D element and cure before adding the next. This gradual encapsulation builds a smooth ramp from nail surface to ghost peak, eliminating the sharp angles that snag fabric.
Lifestyle adjustments protect your 3D ghost manicure investment. Switch to looser clothing temporarily, especially sweaters and knit fabrics that easily catch on raised elements. Be mindful when putting on gloves, reaching into pockets, or handling bedding. If you work in healthcare, food service, or other hands-intensive fields, consider reserving 3D ghost nails for special occasions rather than everyday wear. For maximum durability without sacrificing style, create low-profile ghost designs using thin builder gel layers that provide dimension without extreme height these maintain the 3D effect while fitting seamlessly into active lifestyles.
See More : Black Fall Nails: 20 Stunning Ideas to Elevate Your 2025 Manicure
Can You Create 3D Ghost Nails on Short Natural Nails?
Short natural nails absolutely accommodate 3D ghost designs with strategic scaling and placement choices. The key lies in proportion management smaller ghost shapes suit shorter nail beds better than oversized spirits that overwhelm limited space. Create miniature ghosts no larger than 3-4 millimeters tall using precise dotting tools and fine detail brushes. Position single ghosts near the cuticle area or slightly off-center, leaving negative space that prevents crowded appearances on compact nail surfaces.
Design adaptations maximize visual impact on limited real estate. Single ghost accent nails work beautifully when the rest of your manicure features coordinating flat designs painted bats, spiderwebs, or simple ombre effects. This approach concentrates attention on your 3D elements without overwhelming short nails with competing details. Vertical ghost placement elongates the appearance of short nails, while horizontal positioning can make them seem wider. Choose ghost orientations that complement your natural nail shape rather than fighting against it.
Material selection matters more on short natural nails because weight distribution affects comfort. Lightweight builder gel ghosts feel more comfortable than heavy acrylic structures on smaller nail beds. Ultra-thin pre-made ghost charms provide dimensional effects without bulk that feels unnatural on short nails. Apply strengthening base coats before building 3D elements to reinforce natural nails and prevent stress cracks from the additional weight. With thoughtful design scaling and proper technique, short nail wearers achieve stunning 3D ghost manicures that rival those on longer nail extensions.
What Mistakes Should You Avoid When Creating 3D Ghost Nails?
Proportion errors rank among the most common 3D ghost nail failures. Oversized ghosts that cover more than 60% of the nail surface look cartoonish rather than intentional, while tiny ghosts get lost and fail to deliver the desired dimensional impact. Build ghost bodies that respect the nail’s natural proportions roughly one-third to one-half the nail length works for most nail sizes. Test ghost sizing on a practice nail tip before committing to your actual manicure, especially when learning new sculpting techniques.
Under-curing gel products creates the sticky, peeling disasters that plague DIY 3D ghost nails. Builder gel requires full curing time typically 60 seconds under proper LED lamps or it remains tacky beneath the surface even when the top appears hard. This leads to ghosts detaching within days or developing soft spots that dent with pressure.
Always use the manufacturer’s recommended cure times for your specific gel products and lamp wattage. When building thick 3D elements, cure in layers rather than attempting to harden a large amount of gel in one session.
Poor encapsulation destroys otherwise perfect 3D ghost designs prematurely. Many beginners apply top coat only to the flat nail surface, leaving 3D elements exposed to air, water, and mechanical damage. Your top coat must flow over and around every surface of your ghost design, creating a seamless protective shell. Use a thicker consistency top coat that doesn’t run excessively, applying in multiple thin layers if necessary. Pay special attention to the edges where ghosts meet the nail this junction requires complete sealing to prevent lifting. Matte top coats need extra layers around 3D elements since they don’t self-level like glossy formulas.
How Do You Remove 3D Ghost Nails Without Damaging Natural Nails?
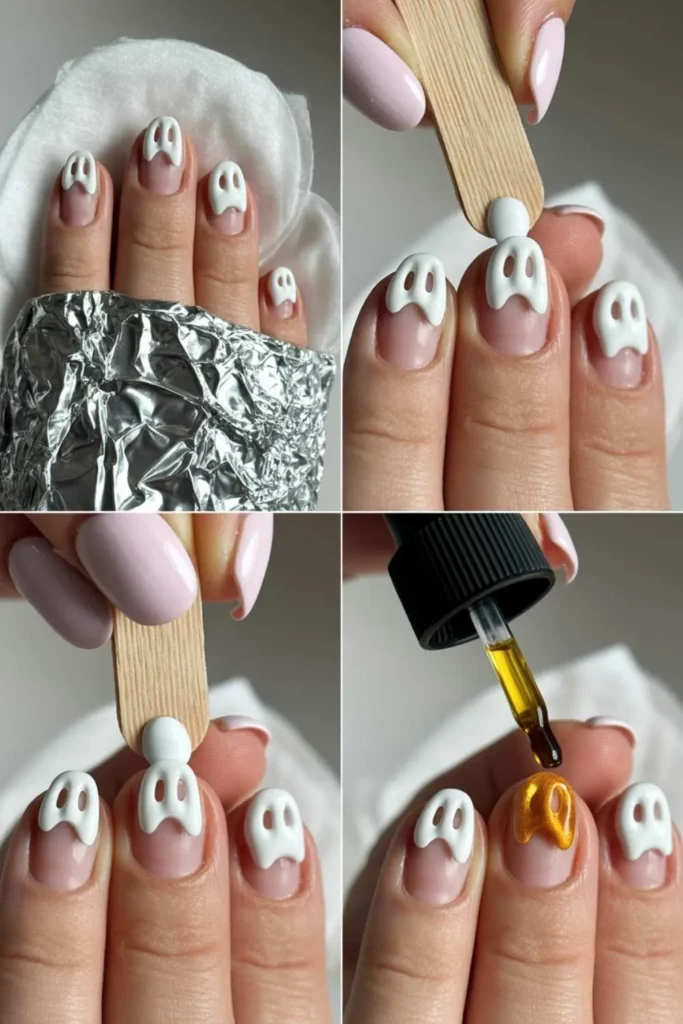
Safe removal of 3D ghost nails requires patience and proper nail care products. For gel-based ghosts over natural nails, soak cotton pads in acetone, place them on each nail, then wrap fingertips in aluminum foil for 10-15 minutes. The acetone breaks down gel polymer bonds, allowing 3D elements to soften.
Use a wooden cuticle pusher to gently slide away dissolved gel never force or pry, which damages the nail plate. Repeat the soaking process for stubborn spots rather than scraping aggressively.
Acrylic ghost removal follows similar principles but requires longer soaking times typically 20-30 minutes for complete breakdown. Pure acetone works faster than nail polish remover containing acetone, though it’s more drying to surrounding skin. Apply cuticle oil around nail edges before soaking to create a protective barrier.
For particularly thick acrylic ghosts, use a coarse file to carefully remove the bulk of the acrylic before soaking, which reduces the time your nails spend exposed to acetone. This filing step requires caution stop immediately when you see your natural nail color beneath the acrylic.
Post-removal nail care prevents damage and promotes healthy regrowth. Wash hands thoroughly after acetone exposure, then apply generous amounts of cuticle oil and hand cream to rehydrate dried tissues. Use a nail strengthening treatment for 3-5 days before applying new polish or enhancements.
If you notice white spots, peeling, or unusual nail flexibility after removal, give your natural nails a break from gel and acrylic for 2-3 weeks. During this recovery period, maintain nail health with daily oil applications, gentle buffing, and a clear strengthening base coat that protects without adding stress from additional enhancements.
See More : Icy Chrome Nails: 25 Stunning Ideas to Elevate Your Winter 2025 Look
What Seasonal Variations Work for Year-Round 3D Ghost Nail Designs?
Valentine’s Day ghost nails transform spooky spirits into romantic characters by swapping traditional white for pink or red ghost bodies. Add tiny heart details painted on ghost faces or position ghosts holding miniature heart embellishments. Red chrome bases with pink 3D ghosts create sophisticated Valentine manicures that feel festive without childish. This unexpected pairing appeals to those who love cute nail art but want something more original than standard Valentine designs.
Summer ghost variations embrace bright neon colors and tropical themes. Neon green, hot pink, or electric blue ghost bodies against white or pastel bases scream summer fun. Create beach ghosts with tiny sunglasses, surfboards, or beach balls painted as accessories. Glow-in-the-dark gel ghosts shine during summer evening events and beach bonfires. Ombre sunset bases transitioning from orange to purple provide stunning backgrounds for white 3D ghosts that seem to float through twilight skies.
Winter and holiday ghost adaptations extend these nail designs through the festive season. White glitter ghosts on deep red or forest green bases nod to Christmas without abandoning the ghost motif. Add tiny Santa hats painted on ghost heads or position ghosts among painted snowflakes and pine trees.
Silver or gold metallic ghost bodies bring luxury to New Year’s Eve manicures. Pastel rainbow ghosts work beautifully for spring celebrations, proving that 3D ghost nail art transcends Halloween when you embrace creative color palettes and seasonal embellishments that keep the concept fresh year-round.
Which Finish Options Best Showcase 3D Ghost Nail Dimension?
Glossy top coats remain the classic choice for 3D ghost nails because they maximize light reflection and shadow contrast. The high-shine finish makes dimensional elements more obvious by creating bright highlights on raised surfaces and darker shadows in recessed areas. Glossy finishes also enhance color vibrancy, making white ghosts appear brighter and base colors more saturated. This traditional finish works particularly well for cute ghost designs and cartoon-style nail art where cheerful, eye-catching aesthetics match the overall concept.
Matte top coats offer sophisticated alternatives that appeal to minimalist nail enthusiasts. The flat, velvety surface creates subtle shadows that emphasize dimension without flashy shine. Matte finishes make 3D ghosts appear more sculptural and artistic, elevating nail designs from playful to gallery-worthy. This finish particularly suits monochromatic manicures black bases with white matte ghosts read as high-fashion Halloween nail art appropriate for upscale events. Matte top coats require thicker application around 3D elements since they lack the self-leveling properties of glossy formulas.
Mixed finish techniques create the most visual interest by combining matte and glossy elements strategically. Apply glossy top coat to the nail base while keeping 3D ghosts matte, making the spirits appear to float above a reflective surface. Reverse this matte bases with glossy ghost elements for different dimensional effects. Textured finishes like sugar effects or velvet powder add tactile variation beyond visual dimension. These specialized top coats transform smooth ghost surfaces into fuzzy, touchable elements that beg for interaction. Experiment with finish combinations to discover which best complements your personal nail aesthetic and the specific ghost design you’ve created.
See More : Swirly French Tip Nails: 30+ Gorgeous Designs to Try Now
Frequently Asked Questions
How much do 3D ghost nails cost at a salon?
Professional 3D ghost nails typically cost between $65-$120 depending on your location, the nail salon’s expertise level, and design complexity. Simple 3D ghost accents on a few fingers cost less, while full nail sets featuring intricate scene work or multiple 3D elements per nail command premium pricing. High-end salons in major cities charge more than suburban or small-town nail studios, though price doesn’t always correlate with quality check online reviews and artist portfolios before booking.
Can you do 3D ghost nails on your own at home?
Yes, DIY 3D ghost nails are achievable with practice and proper supplies. Start with pre-made ghost charms and nail glue for the easiest approach, then progress to builder gel ghosts as your skills develop. YouTube tutorials and nail art blogs provide step-by-step guidance for various skill levels. Invest in quality UV/LED lamps, proper brushes, and recommended gel or acrylic products cheap supplies produce frustrating results that discourage beginners. Allow 2-3 hours for your first attempt, with time decreasing as techniques become familiar.
What nail shape works best for 3D ghost designs?
Almond, oval, and coffin nail shapes provide optimal canvases for 3D ghost nail art because their tapered forms naturally draw eyes toward design elements. Square nails work well too, offering more surface area for elaborate ghost scenes. Stiletto nails suit dramatic 3D designs but may feel impractical for daily wear. Avoid extremely short round nails for complex multi-ghost designs they lack space for multiple 3D elements without appearing cluttered. Choose nail shapes that match your lifestyle first, then adapt ghost designs to fit available space.
Do 3D ghost nails damage your natural nails?
Properly applied and removed 3D ghost nails cause minimal damage to natural nails. The risk comes from aggressive removal techniques picking, peeling, or prying off gel and acrylic strips away nail layers. Always soak off enhancements with acetone and use gentle pressure with wooden tools. Repeated gel applications without breaks can lead to nail thinning, so give your natural nails 1-2 weeks rest every 2-3 months. Use strengthening treatments and cuticle oil regularly to maintain nail health between manicures.
How do you make 3D ghosts look less bulky on nails?
Strategic layering creates dimension without excessive bulk. Build ghost bodies in thin layers rather than one thick application, allowing each layer to cure before adding the next. This technique produces stronger structures with less material. Position ghosts thoughtfully placing them toward nail centers rather than edges reduces the perception of bulk.
Use semi-transparent builder gel mixed with white pigment rather than opaque white gel to create ghost forms that feel lighter and more ethereal. Finally, ensure smooth transitions between ghost bases and nail surfaces so edges don’t create bulky-looking ridges.
Can you add glitter to 3D ghost nail designs?
Glitter integration enhances 3D ghost nails beautifully when applied thoughtfully. Mix fine glitter into clear gel before building ghost bodies for sparkly transparent spirits. Apply glitter polish to the nail base around 3D elements for magical atmospheric effects. Use chunky glitter sparingly as accents on ghost accessories or surrounding nail art to avoid competing with your main 3D elements. Always encapsulate glitter with multiple top coat layers to prevent rough textures that catch on fabrics this step proves especially important when combining glitter with raised 3D designs.
Conclusion
3D ghost nails represent the perfect intersection of technical skill and creative expression in modern nail art. Whether you choose professional acrylic sculpting, accessible builder gel techniques, or convenient pre-made charms, these dimensional designs transform ordinary manicures into conversation-starting wearable art.
The versatility of ghost nail designs extends far beyond Halloween, offering year-round styling options through creative color choices and seasonal adaptations.
Success with 3D ghost nails comes from understanding material properties, respecting proportion principles, and committing to proper application techniques. Start with simpler designs to build confidence, then progress to complex multi-element scenes as your skills develop.
Remember that even experienced nail artists faced learning curves patience and practice separate adequate results from stunning manicures that showcase true dimensional beauty.
Your journey to mastering 3D ghost nail art begins with a single attempt, armed now with professional knowledge that turns Pinterest inspiration into tangible reality on your fingertips.
